
Why Did My Scones Not Rise? (The 5 Golden Scone Rules)
Few bakes are more quintessentially British than a warm, feather-light scone served with clotted cream and strawberry jam. But if your scones came out flat, dense, or lopsided, here is the culinary science behind why scones fail to rise and the 5 golden rules to guarantee tall, flaky bakes every time.

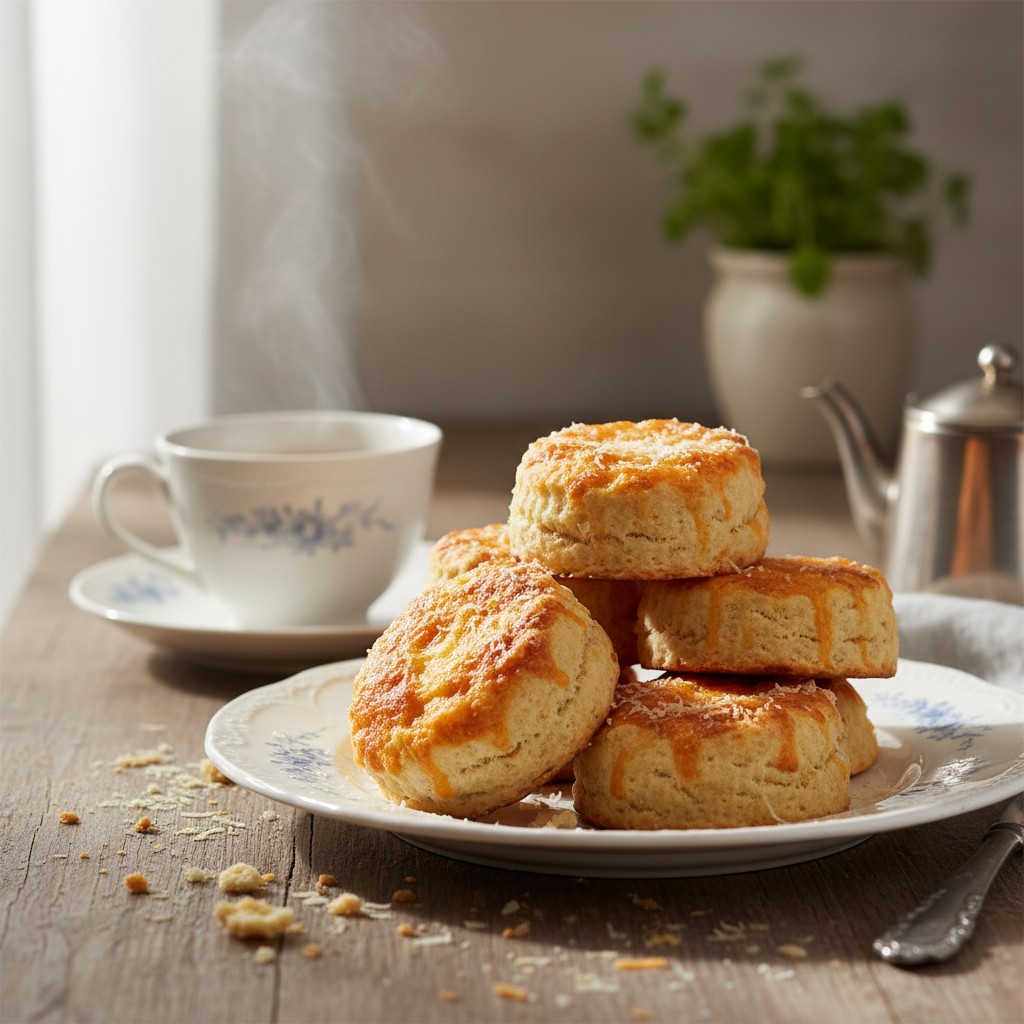
Quick Answer: Why Did My Scones Not Rise?
Scones fail to rise primarily because the dough was rolled out too thinly (it should be at least 2.5cm / 1 inch thick), the pastry cutter was twisted when stamping out the rounds (which seals the gluten edges and prevents upward expansion), or the self-raising flour/baking powder was expired. Additionally, over-kneading the dough develops tough gluten that restricts rising in the oven.
The Baking Science: How Scones Get Their Height
To understand why did my scones not rise, we have to look at the unique culinary mechanics of scone dough. Unlike yeast breads that rely on fermentation or sponge cakes that depend on creaming butter and sugar, British scones rely on a rapid mechanical and chemical burst called oven spring.
When cold butter is rubbed into self-raising flour, small lentil-sized flakes of fat remain suspended in the flour. In the intense heat of the oven, the moisture in the butter and milk turns to steam, pushing the flour layers apart while the baking powder releases carbon dioxide gas. If the dough has been handled roughly or cut incorrectly, this delicate rising mechanism is instantly crushed.
Golden Rule 1: Never Twist Your Pastry Cutter (The Sealed Edge Trap)
The single most common mistake home bakers make is twisting the metal or fluted cutter as they press down into the dough. It feels natural to give the cutter a quick twist to release the round, but this action is fatal to your scone's height.
When you twist the cutter, the circular motion pinches and smears the delicate raw gluten layers together around the circumference. This forms a tight, sealed rim that locks the steam and carbon dioxide inside, preventing the scone from rising vertically. The scone either remains flat or buckles into an uneven, lopsided wedge.
- The Golden Fix: Dip your cutter in plain flour before each cut. Press straight down firmly in one decisive motion, and pull straight up without rotating. Tap the cutter lightly to drop the dough round onto the baking tray.
Golden Rule 2: Keep the Dough Thick (The 2.5cm Rule)
Many bakers mistakenly treat scone dough like biscuit dough, rolling it out with a rolling pin until it is only 1cm to 1.5cm thick. Even with active raising agents, a thin disk of dough cannot achieve that proud, bakery-style height.
- The Golden Fix: Put away your rolling pin entirely! Pat the dough out gently using the palms of your hands until it is at least 2.5cm to 3cm (1 to 1.25 inches) thick. Remember: the raw unbaked round should already look chunky and tall before it ever enters the oven.
Golden Rule 3: Handle with a Feather Touch (Avoid Over-Kneading)
Scone dough requires a gentle hand. The moment you add liquid (milk or buttermilk) to flour, gluten proteins begin forming elastic bonds. If you knead scone dough like bread, the gluten network becomes tough, tight, and rubbery.
During baking, this tight gluten web acts like a taut elastic band, pulling down against the rising gases and preventing the scone from expanding. Over-worked dough also results in a heavy, chewy crumb instead of a tender, melt-in-the-mouth texture.
- The Golden Fix: Use a round-bladed palette knife or butter knife to bring the wet and dry ingredients together in the bowl until a soft, rough dough just forms. Turn it onto a lightly floured worktop and bring it together in no more than 3 to 4 gentle folds.
Golden Rule 4: Use Fresh, Active Raising Agents
Scones depend entirely on chemical leavening for their rapid 10-minute rise. If your self-raising flour has been sitting in a warm, humid pantry cupboard for six months, the chemical raising agents have likely absorbed ambient moisture and degraded.
If you are making your own self-raising flour from plain flour, make sure you follow the exact ratios in our Self-Raising vs Plain Flour UK Guide. Using old baking powder or incorrect measurements will leave you with flat, dense scones.
- The Golden Fix: Check the date on your flour and baking powder. To test your baking powder, stir 1/2 teaspoon into a small cup of warm water. It should fizz and foam vigorously within 5 seconds. If it only produces lazy bubbles, discard it and buy a fresh pot.
Golden Rule 5: Blast with High Heat (The Oven Spring Secret)
Scones cannot be baked in a moderate or slow oven. Unlike delicate sponges that bake at 180°C (350°F) to avoid collapsing—as detailed in our guide on Why Did My Cake Sink in the Middle?—scones require a sudden, intense burst of heat to vaporize the butter moisture into steam before the flour sets.
- The Golden Fix: Preheat your oven to a blazing 220°C (200°C Fan / 425°F / Gas Mark 7). Make sure the oven has reached full temperature for at least 15 minutes before placing the baking sheet on the upper-middle shelf. Scones should bake quickly in just 10 to 12 minutes.
The Egg Wash Mistake: Why Scones Rise Lopsided
Have you ever baked scones that rose dramatically on one side while the other side stayed glued to the tray? The culprit is usually dripping egg wash or milk glaze.
When brushing the tops of your scones with beaten egg or milk for a golden glaze, never let the liquid drip down the sides. The raw egg wash runs down the vertical edge and cooks instantly against the hot metal tray, effectively 'gluing' the side of the scone down and forcing it to burst open awkwardly on only one side.
- The Fix: Lightly glaze only the flat top surface of each round, using a pastry brush with minimal liquid.
Scone Troubleshooting Diagnostic Checklist
Use this quick diagnostic table to pinpoint exactly what happened to your bake:
- Scones are flat and heavy: Dough was rolled too thin, kneaded too long, or raising agent was expired.
- Scones rose sideways or tilted: Cutter was twisted, or egg wash dripped down the side.
- Scones have a tough, bread-like texture: Over-kneaded dough or baked at too low a temperature for too long.
- Scones have yellow spots and a metallic taste: Baking powder was not sifted evenly throughout the flour.
- Scone bottoms are burnt before the tops are golden: Baking tray was too close to the bottom oven element; move to the upper-middle shelf.
Mary Berry's Golden Secrets for Classic Scones
Put these rules into practice with our traditional recipes. For a savoury teatime treat, make a batch of Mary Berry's Classic Cheese Scones. The grated mature Cheddar and mustard powder add rich flavour without weighing down the crumb.
Mary Berry always advises chilling your butter before rubbing it into the flour so that the fat doesn't melt into an oily paste. If your kitchen is warm, you can even grate frozen butter directly into the flour bowl using a box grater for an effortless, flaky rise.
✨ Mary Berry's Scone Rule of Thumb
"The secret to light, airy scones is a wet, soft dough and a very light touch. Do not roll the dough—just pat it out with your hands. And when cutting, press straight down and pull straight up. Never twist the cutter, or you will lock in the rise!"
Frequently Asked Questions
Can I make scone dough in advance?
No, once the liquid activates the raising agents, the dough must be stamped out and baked immediately. However, you can freeze unbaked cut scone rounds on a baking sheet, store them in a freezer bag, and bake them straight from frozen at 220°C for 14 to 15 minutes.
Should scones be baked close together or spaced far apart?
Placing scones relatively close together (about 2cm / 1 inch apart) on the baking tray helps them rise taller, as they support each other and rise upward rather than spreading outward.
Why are my scones dry and crumbly?
Dry scones usually result from not adding enough milk to form a soft, pillowy dough, or leaving them in the oven for too long. Scone dough should be slightly sticky before cutting.
Charlotte Davies
Lead Culinary Editor & British Baking Specialist
Passionate British baker and food writer specialising in traditional British home baking, foolproof kitchen science, and Mary Berry-inspired recipes.
More Helpful Baking Guides
 Baking Tips & Science
How to Fix Grainy or Split Buttercream in Under 2 Minutes (Foolproof Guide)
You spend time beating butter and icing sugar for a celebration cake, but instead of a silky, pipeable cloud of frosting, your buttercream feels gritty on the tongue or separates into a curdled mess. Here is why buttercream turns grainy and how to rescue it in under two minutes with simple kitchen science.
Baking Tips & ScienceHow to Line a Round Cake Tin with Baking Parchment (No Sticking)
Few things ruin a baker's day faster than turning out a freshly baked sponge only to leave half the golden crust stuck to the bottom of the tin. Here is the definitive step-by-step guide on how to line a round cake tin with baking parchment like a professional British pastry chef.