Mary Berry Recipes
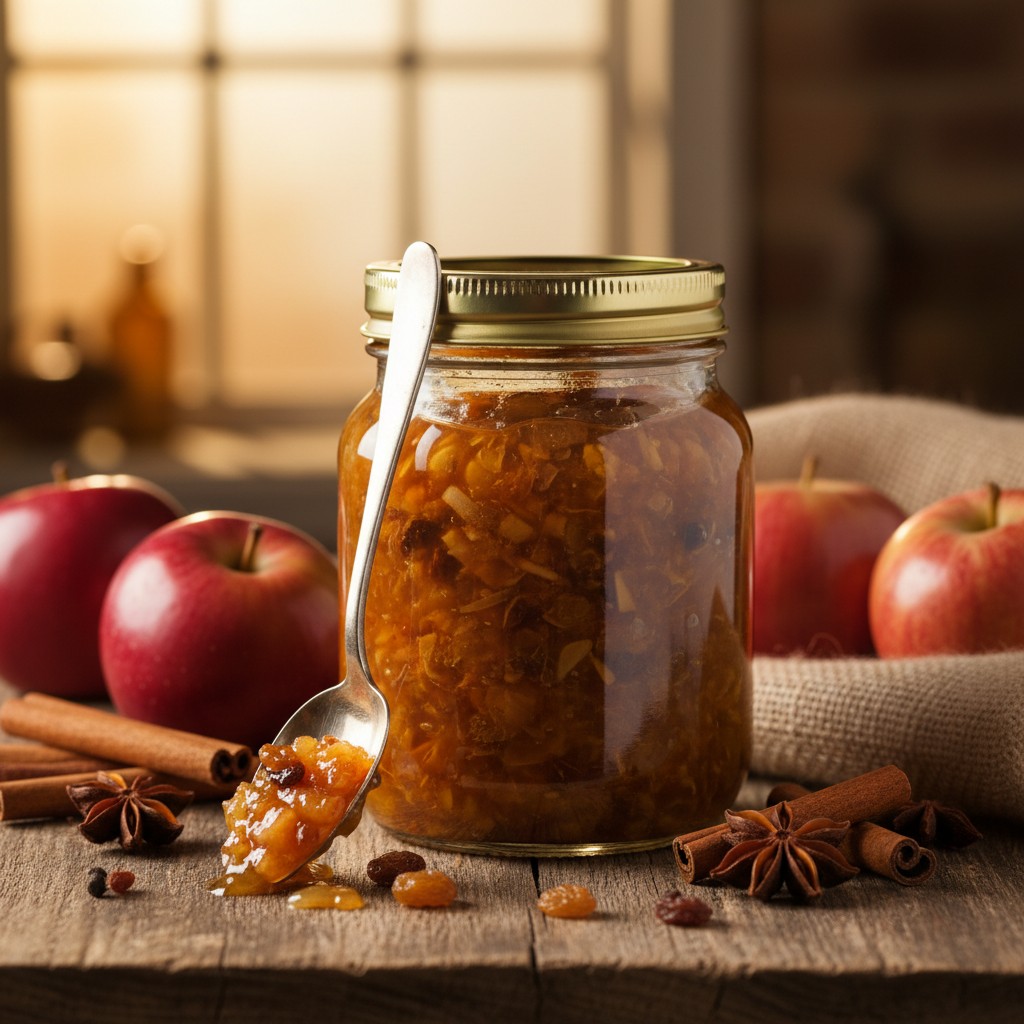
Classic Apple Chutney
This delightful apple chutney, a true staple of the British larder, is wonderfully simple to prepare and offers a burst of flavour. It's truly versatile, perfect alongside a cheeseboard or a hearty roast.
Why You'll Love This Recipe
- Uses readily available, inexpensive ingredients, especially when apples are in season.
- A wonderfully versatile condiment, enhancing everything from cheese boards to cold meats.
- The long, slow simmer develops incredibly complex and rich flavours.
- A truly rewarding project that yields delicious results and makes thoughtful gifts.
Ingredients
- 1 kg (about 2 lb) cooking apples (such as Bramley), peeled, cored, and roughly chopped
- 500g (1 lb) onions, peeled and finely chopped
- 500g (1 lb) light muscovado sugar (or soft brown sugar)
- 500ml (1 pint) malt vinegar
- 150g (5 oz) sultanas (or raisins)
- 2 tsp ground ginger
- 1 tsp ground allspice
- 1/2 tsp cayenne pepper (optional, for a subtle kick)
- 1 tsp salt
Equipment Needed
Large, heavy-based saucepan or preserving pan • Wooden spoon • Chopping board • Sharp knife • Measuring spoons and jug • Sterilised jars with lids (approx. 4-5 medium sized)
Step-by-Step Instructions
- Begin by preparing your apples and onions. Peel, core, and roughly chop the cooking apples, and then finely chop the onions. Place them into a large, heavy-based saucepan or preserving pan.
- Add the sugar, malt vinegar, sultanas, ground ginger, ground allspice, cayenne pepper (if using), and salt to the pan with the apples and onions. Give everything a good stir to combine.
- Place the pan over a medium heat and bring the mixture gently to a boil, stirring occasionally to ensure the sugar dissolves completely.
- Once boiling, reduce the heat to a low simmer. Continue to cook, uncovered, for about 1 to 1½ hours, stirring frequently to prevent sticking, especially towards the end of the cooking time.
- The chutney is ready when it has thickened considerably, and you can draw a wooden spoon across the bottom of the pan and see the base for a few seconds before the mixture fills the gap. The apples should be tender, and the liquid should be syrupy.
- While the chutney is simmering, prepare your jars. Wash them thoroughly in hot, soapy water, rinse well, and then place them upside down on a baking tray in a cool oven (around 120°C/100°C fan/Gas ½) for at least 15 minutes to sterilise. Ensure the lids are also sterilised, either by boiling them for 5 minutes or pouring boiling water over them.
- Carefully spoon the hot chutney into the hot, sterilised jars, filling them right to the brim. Seal immediately with the sterilised lids.
- Allow the jars of chutney to cool completely before labelling. Store them in a cool, dark place for at least 4-6 weeks to allow the flavours to mature fully. This patience will be wonderfully rewarded!
How to Store \u0026 Reheat
Once sealed and cooled, store your jars of chutney in a cool, dark cupboard for at least 4-6 weeks to allow the flavours to fully develop and mature. This waiting period is crucial for the very best taste! Once opened, store the chutney in the refrigerator and consume within 4-6 weeks. There's no need to reheat chutney; it's best served at room temperature.
Mary's Secrets to Success
For sheer perfection, always use a large, heavy-based pan to prevent sticking and ensure even cooking. Don't be tempted to rush the simmering process; a slow, gentle cook allows the flavours to meld beautifully. And remember, sterilising your jars meticulously is absolutely essential for safe preservation and to prevent spoilage. Finally, a little patience goes a long way – let your chutney mature for at least a month; the wait is wonderfully rewarded with deeper, richer flavours!
Frequently Asked Questions
Can I use different types of apples for this chutney?
Absolutely, dear! While Bramley apples are my go-to for their wonderful tartness and ability to break down beautifully, you can certainly experiment with other firm, tart cooking apples. Just ensure they're not too sweet, as you need that acidity to balance the sugar and vinegar for sheer perfection.
How do I know when the chutney is ready?
A good chutney has a lovely thick, jammy consistency. You'll know it's ready when you can draw a wooden spoon across the bottom of the pan, and the mixture parts, revealing the base for a few seconds before slowly filling back in. The apples should be tender, and the liquid should be syrupy and glossy. Don't be tempted to rush this stage; patience is key!
How long does homemade chutney last?
Properly sealed and stored in a cool, dark place, this chutney will keep for up to a year, sometimes even longer. The flavours truly develop and deepen over time, which is why I always recommend maturing it for at least 4-6 weeks before opening. Once opened, store it in the refrigerator and enjoy within 4-6 weeks.
What is the best way to sterilise jars?
Sterilising jars is crucial for preserving your chutney safely. My preferred method is to wash the jars thoroughly in hot, soapy water, rinse them well, and then place them upside down on a baking tray in a cool oven (around 120°C/100°C fan/Gas ½) for at least 15 minutes. For the lids, you can either boil them for 5 minutes or pour boiling water over them, ensuring they are completely dry before sealing.
Can I reduce the amount of sugar in the recipe?
While I understand the desire to reduce sugar, it plays a vital role in chutney, not just for flavour but also for its preserving qualities and texture. Significantly reducing it might affect the chutney's shelf life and consistency. I've found this balance to be just right for a classic chutney, but if you must, a slight reduction (no more than 50g) might be acceptable, though I can't guarantee the same long-term keeping quality.