Mary Berry Recipes
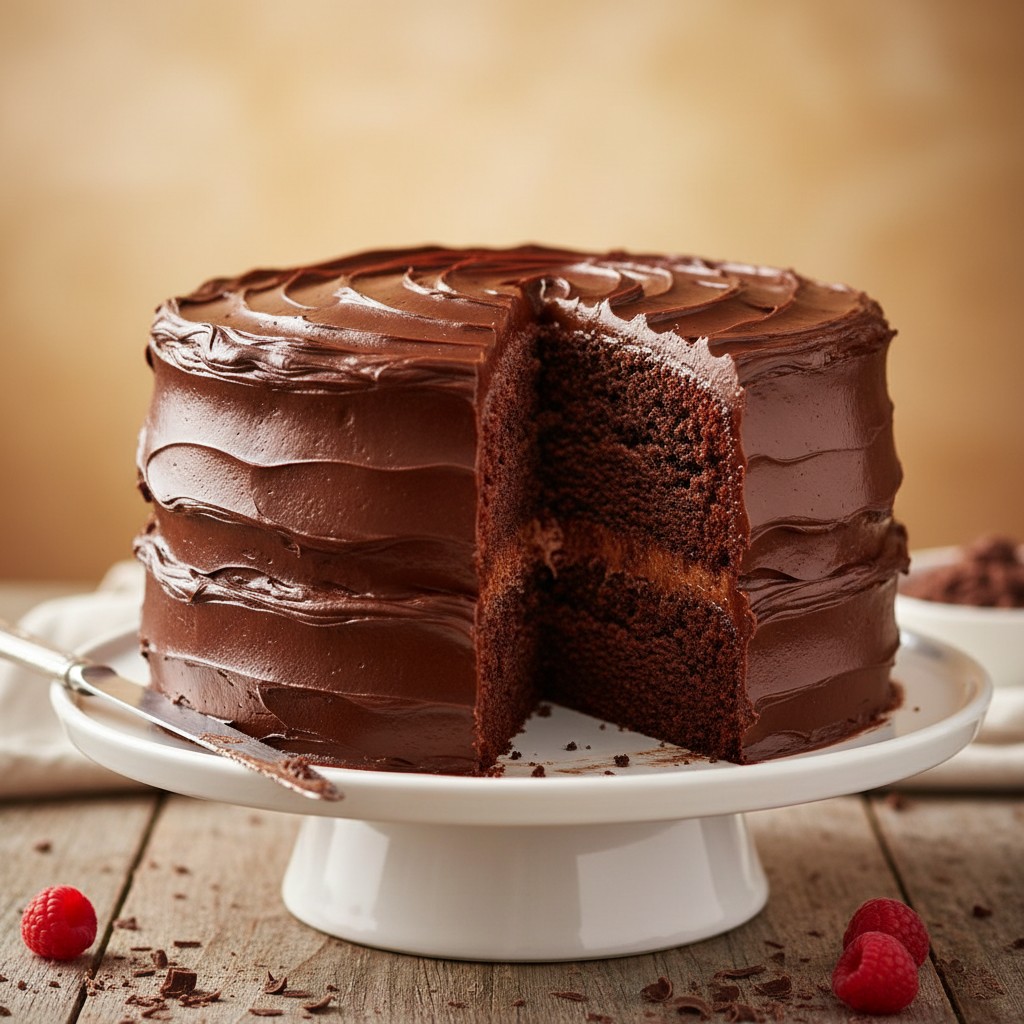
Classic All-in-One Chocolate Fudge Cake
This delightful chocolate fudge cake is a true testament to the joy of simple baking. With the "all-in-one" method, you'll achieve a wonderfully moist and rich cake with minimal fuss.
Why You'll Love This Recipe
- Effortless Baking: The "all-in-one" method simplifies the process, making it perfect for busy schedules and beginners.
- Consistently Moist: Using a balanced ratio of ingredients ensures a beautifully moist and tender crumb every single time.
- Rich Chocolate Flavour: A combination of good quality cocoa powder and optional dark chocolate in the frosting delivers an intense, satisfying chocolate experience.
Ingredients
- 225g (8oz) self-raising flour
- 2 tbsp cocoa powder, good quality
- 1 tsp bicarbonate of soda
- 225g (8oz) caster sugar
- 100g (4oz) butter, softened
- 2 large eggs
- 150ml (5fl oz) milk
- 1 tbsp vanilla extract
- For the Chocolate Fudge Frosting:
- 100g (4oz) butter, softened
- 200g (7oz) icing sugar, sifted
- 40g (1½oz) cocoa powder, sifted
- 2-3 tbsp milk
- 50g (2oz) dark chocolate, melted and cooled (optional, for extra richness)
Equipment Needed
Two 20cm (8in) round sandwich tins • Baking parchment • Large mixing bowl • Electric hand mixer or stand mixer • Sieve • Wire cooling rack • Palette knife or spatula
Step-by-Step Instructions
- Preheat your oven to 180°C (160°C fan/Gas 4). Grease and line two 20cm (8in) round sandwich tins with baking parchment.
- For the cake, place all the cake ingredients – self-raising flour, cocoa powder, bicarbonate of soda, caster sugar, softened butter, eggs, milk, and vanilla extract – into a large mixing bowl.
- Beat with an electric mixer on a medium speed for about 2-3 minutes until all the ingredients are thoroughly combined and the mixture is smooth and light. Be careful not to overmix, my dears!
- Divide the mixture evenly between the two prepared sandwich tins.
- Bake in the preheated oven for 30-35 minutes, or until the cakes are well-risen, golden, and spring back when lightly pressed in the centre. A skewer inserted into the middle should come out clean.
- Leave the cakes to cool in their tins for 5-10 minutes before turning them out onto a wire rack to cool completely. This is crucial for easy handling!
- While the cakes are cooling, prepare the chocolate fudge frosting. Place the softened butter into a bowl and beat until creamy.
- Gradually sift in the icing sugar and cocoa powder, beating well after each addition until smooth.
- Add the milk, one tablespoon at a time, until you achieve a smooth, spreadable consistency. If using, stir in the cooled melted dark chocolate for an extra touch of decadence.
- Once the cakes are completely cold, spread half of the chocolate fudge frosting over the top of one cake. Carefully place the second cake on top.
- Generously spread the remaining frosting over the top and sides of the assembled cake. For a charming finish, you might swirl the frosting with the back of a spoon or decorate with chocolate shavings, if you fancy. Slice and enjoy this truly delightful creation!
How to Store \u0026 Reheat
This cake keeps beautifully! Store the cake in an airtight container at room temperature for up to 3-4 days. There's no need to refrigerate it, as this can dry out the sponge. I wouldn't recommend reheating this particular cake, as it's best enjoyed at room temperature, allowing the frosting to be perfectly soft and the sponge wonderfully moist. It also freezes well, unfrosted, for up to 3 months. Wrap individual sponges tightly in clingfilm and then foil. Thaw at room temperature before frosting.
Mary's Secrets to Success
The key to a truly magnificent all-in-one cake is to ensure all your ingredients, especially the butter and eggs, are at room temperature. This allows them to emulsify beautifully, creating a smooth batter and a wonderfully even texture. Don't be tempted to overmix; just beat until combined and light. And remember, my dears, a perfectly cooled cake is essential before you even think about frosting – patience is a virtue in baking!
Frequently Asked Questions
Why is my cake dry?
A dry cake often comes from over-baking, my dear. Make sure to check it a few minutes before the suggested time. Also, ensure your oven temperature is accurate – an oven thermometer can be a great friend in the kitchen!
Can I make this as a traybake?
Absolutely! You can bake this in a 23x33cm (9x13in) rectangular tin. The baking time might be slightly different, around 25-30 minutes, so keep a watchful eye and test with a skewer.
My frosting is too stiff/too runny, what should I do?
If it's too stiff, add another half-teaspoon of milk at a time, beating until smooth. If it's too runny, add a tablespoon or two more of sifted icing sugar and cocoa powder until it reaches the desired consistency. It's all about finding that perfect balance!
Can I add chocolate chips to the cake batter?
Oh, what a lovely idea! Yes, you certainly can. Stir in about 100g (4oz) of chocolate chips (milk, dark, or white, as you prefer) into the batter just before dividing it into the tins. It adds a delightful texture and extra burst of chocolate.
What's the secret to getting a flat-topped cake?
The "all-in-one" method often helps with a flatter top, as the ingredients are so well combined. Ensure your oven is preheated properly and don't open the oven door too early. For truly level cakes, you can use baking strips around your tins, or simply level them gently with a serrated knife once cooled.