Mary Berry Recipes
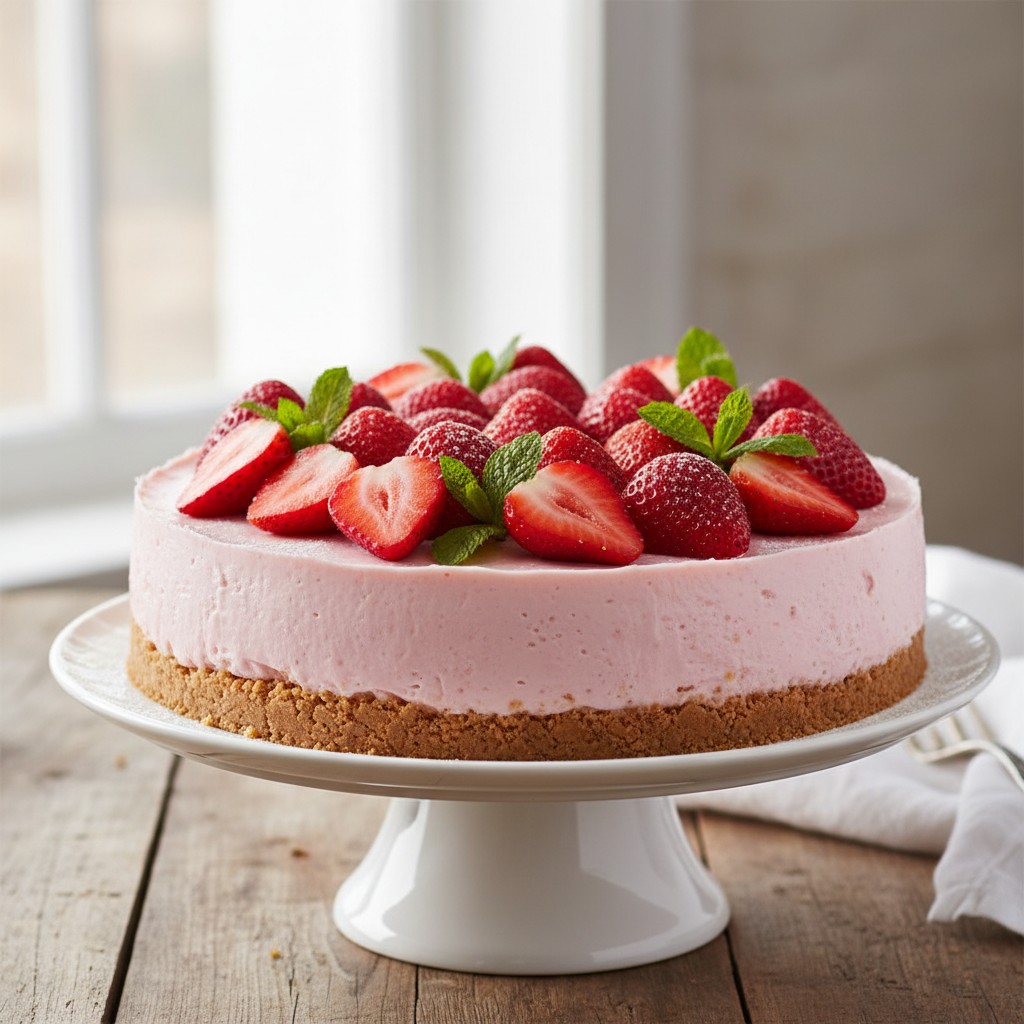
Delightful No-Bake Strawberry Cheesecake
This delightful no-bake strawberry cheesecake is an absolute joy to prepare and even more so to eat. With its creamy texture and fresh strawberry topping, it's a wonderfully simple dessert that never fails to impress.
Why You'll Love This Recipe
- No baking required, making it wonderfully simple and perfect for any skill level.
- Combines a buttery biscuit base with a light, creamy filling and fresh fruit for a delightful contrast.
- Can be prepared ahead of time, freeing you up to enjoy your guests or a leisurely meal.
Ingredients
- For the Base:
- 250g digestive biscuits
- 100g unsalted butter, melted
- For the Filling:
- 600g full-fat cream cheese, softened
- 100g icing sugar, sifted
- 1 tsp vanilla extract
- Zest of 1 lemon
- 2 tbsp lemon juice
- 300ml double cream
- 2 sheets leaf gelatin (or 1 tsp powdered gelatin, prepared according to packet instructions)
- 50g fresh strawberries, finely chopped (optional, for inside the filling)
- For the Topping:
- 400g fresh strawberries, hulled and halved or sliced
- 1 tbsp icing sugar (optional, for dusting or glaze)
- 1 tbsp water (if making a simple glaze)
Equipment Needed
23cm springform cake tin • Baking parchment • Food processor (or large freezer bag and rolling pin) • Large mixing bowl • Medium mixing bowl • Electric whisk (or balloon whisk) • Small saucepan • Spatula • Measuring spoons and cups
Step-by-Step Instructions
- Prepare your tin: Lightly grease and line the base of a 23cm springform cake tin with baking parchment. This makes it ever so easy to remove later.
- Make the biscuit base: Place the digestive biscuits in a food processor and blitz until they form fine crumbs. Alternatively, put them in a strong freezer bag and bash with a rolling pin – a lovely way to release a little tension! Melt the butter gently in a small saucepan or microwave, then pour it over the biscuit crumbs. Mix thoroughly until all the crumbs are coated.
- Press the base: Tip the buttery crumbs into your prepared springform tin. Press them down firmly and evenly over the base using the back of a spoon or your fingertips. Pop this into the refrigerator to chill while you prepare the filling.
- Prepare the gelatin: If using leaf gelatin, soften the sheets in a bowl of cold water for about 5-10 minutes. If using powdered gelatin, follow the packet instructions to bloom it.
- Make the filling: In a large mixing bowl, beat the softened cream cheese with the sifted icing sugar, vanilla extract, lemon zest, and lemon juice until smooth and creamy. A lovely, light consistency is what we're aiming for.
- Whip the cream: In a separate bowl, whip the double cream until it holds soft peaks. Be careful not to over-whip, as we want it lovely and smooth.
- Dissolve gelatin: Gently heat 2 tablespoons of water (or the liquid specified for powdered gelatin) in a small saucepan. Squeeze out any excess water from the softened leaf gelatin and add it to the warm water, stirring until completely dissolved. Let it cool slightly but do not allow it to set.
- Combine: Gently fold the whipped cream into the cream cheese mixture. Then, slowly pour in the cooled, dissolved gelatin, folding it in quickly and evenly to ensure it's well incorporated without lumps. If using, fold in the finely chopped strawberries now.
- Assemble: Pour the creamy filling over the chilled biscuit base in the springform tin. Gently smooth the top with a spatula.
- Chill: Place the cheesecake into the refrigerator for at least 4 hours, or preferably overnight, until it is completely set and firm. This is crucial for achieving that wonderfully stable slice.
- Decorate and serve: Once firm, carefully release the cheesecake from the springform tin. Arrange the fresh strawberry halves or slices artfully over the top. You can dust with a little icing sugar for a lovely finish, or warm 1 tbsp icing sugar with 1 tbsp water to create a simple glaze to brush over the strawberries for a beautiful shine. Slice and serve!
How to Store \u0026 Reheat
This cheesecake is best enjoyed fresh, but it will keep beautifully in an airtight container in the refrigerator for up to 3-4 days. I wouldn't recommend freezing a no-bake cheesecake, as the texture of the cream cheese filling can become a little grainy upon thawing, losing that wonderfully smooth consistency we've worked so hard to achieve.
Mary's Secrets to Success
Always ensure your cream cheese is at room temperature before you start mixing. This prevents lumps and ensures a wonderfully smooth filling. When melting your butter for the base, do it gently. Overheating can separate the butter solids, and we want a beautifully cohesive crumb. Don't rush the chilling! That long, patient chill in the refrigerator is the secret to a perfectly set, sliceable cheesecake. It's well worth the wait, trust me! For the freshest taste, add your strawberries to the top just before serving. This keeps them looking vibrant and juicy. A little lemon zest in the filling really brightens the flavour and cuts through the richness, creating a beautifully balanced dessert.
Frequently Asked Questions
My cheesecake isn't setting, what went wrong?
This usually happens if the gelatin wasn't fully dissolved or if it wasn't incorporated quickly enough into the cold cream cheese mixture, causing it to set in lumps. Ensuring your cream cheese is at room temperature and the gelatin is cooled but still liquid when folded in is key. Also, make sure you've given it ample chilling time – sometimes it just needs a little longer!
Can I use low-fat cream cheese?
While you certainly can, I strongly recommend using full-fat cream cheese for this recipe. The higher fat content is crucial for achieving that wonderfully rich, creamy texture and ensuring the cheesecake sets properly without becoming too watery.
How do I get clean slices?
For beautifully neat slices, run a sharp knife under hot water, wipe it dry, and then make each cut. Clean the knife between each slice for sheer perfection.
Can I prepare this the day before?
Absolutely, and in fact, I encourage it! Making this cheesecake the day before allows it plenty of time to chill and set properly, enhancing both the flavour and the texture. It’s a wonderful make-ahead dessert for entertaining.
What if I don't have a springform tin?
You can use a regular deep-sided cake tin, but you'll need to line it very thoroughly with cling film or baking parchment, leaving an overhang to help you lift the cheesecake out once set. This will make it much easier to remove without damaging that lovely base.