Mary Berry Recipes
Classic Victoria Sponge Cake (9-inch)
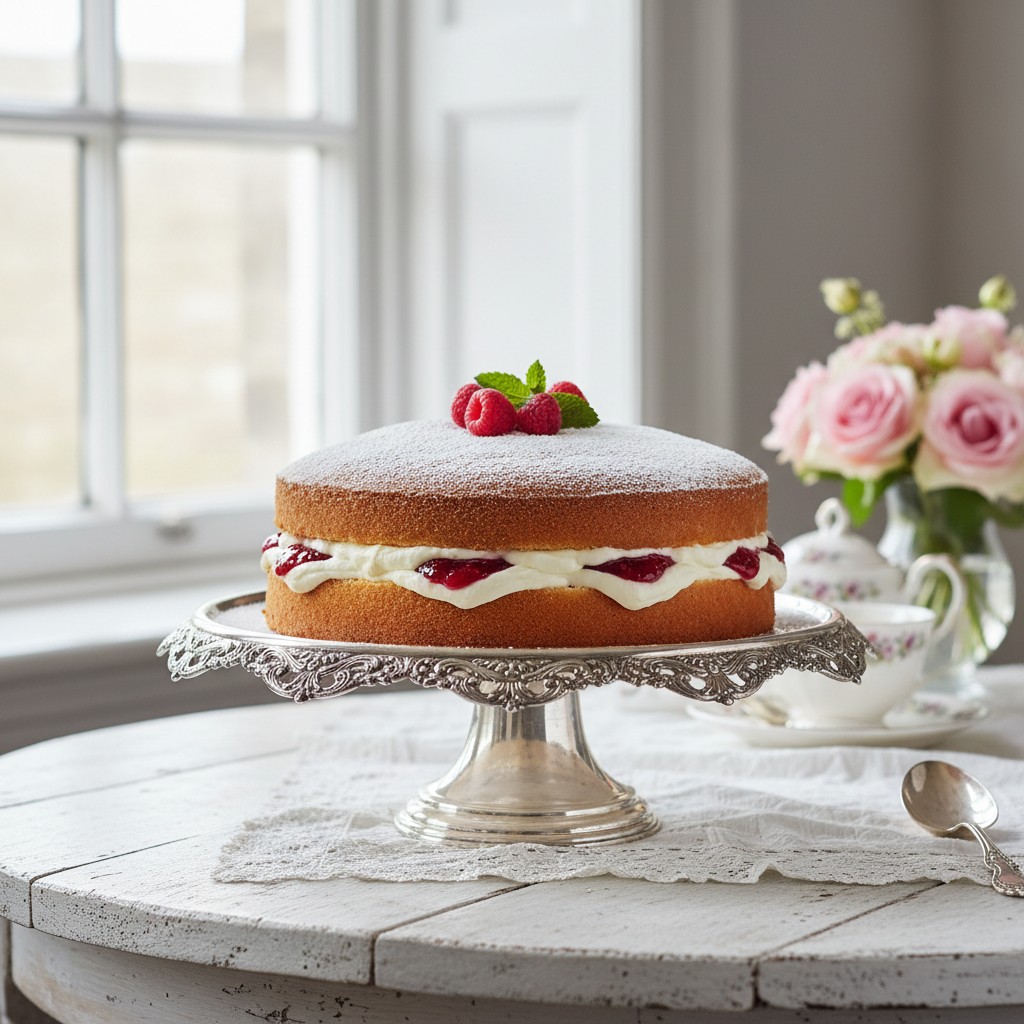
There's nothing quite so comforting and celebratory as a beautifully baked Victoria Sponge. This recipe ensures a light, airy texture and a truly delightful flavour, perfect for any occasion.
Why You'll Love This Recipe
- Utilises the 'all-in-one' method, making it wonderfully simple and reliable for consistent results.
- Achieves a beautifully light, tender, and moist crumb that melts in the mouth.
- A versatile base that pairs perfectly with a variety of fillings, though jam and cream are truly classic.
Ingredients
- 225g (8oz) softened unsalted butter, plus extra for greasing
- 225g (8oz) caster sugar
- 4 large eggs, at room temperature
- 225g (8oz) self-raising flour
- 1 tsp baking powder (optional, for extra lift)
- 2 tbsp milk, at room temperature
- 1 tsp vanilla extract
- For the filling:
- 4 tbsp good quality strawberry or raspberry jam
- 250ml (9fl oz) double cream, whipped until just holding its shape
- Icing sugar, for dusting (optional)
Equipment Needed
2 x 9-inch (23cm) round sandwich tins • Large mixing bowl • Electric hand mixer (or stand mixer with paddle attachment) • Rubber spatula • Wire cooling rack • Measuring scales • Measuring spoons • Baking parchment
Step-by-Step Instructions
- Preheat your oven to 180°C (160°C fan/Gas 4). Lightly grease two 9-inch (23cm) round sandwich tins and line the bases with baking parchment. This ensures your cakes will turn out beautifully.
- In a large mixing bowl, combine the softened butter, caster sugar, large eggs, self-raising flour, baking powder (if using), milk, and vanilla extract. It's all-in-one, making it wonderfully straightforward!
- Beat with an electric mixer on a medium speed for 2-3 minutes until the mixture is beautifully pale, light, and creamy. Be careful not to overmix at this stage; just until everything is well combined and fluffy.
- Divide the mixture evenly between the two prepared tins. Gently level the tops with the back of a spoon or a small spatula to ensure an even bake.
- Bake for 25-30 minutes, or until the cakes are golden brown, well-risen, and spring back gently when lightly touched in the centre. A skewer inserted into the middle should come out clean.
- Remove the cakes from the oven and let them cool in their tins for a good 5 minutes. This allows them to firm up slightly before you turn them out onto a wire rack to cool completely. Patience is key!
- Once completely cool, place one sponge onto your chosen serving plate. Spread generously with your favourite good quality jam, then top with the freshly whipped double cream. Oh, that's sheer indulgence!
- Carefully place the second sponge on top, pressing down ever so gently. If you wish, dust the top with a little icing sugar just before serving for that classic finish. Now, stand back and admire your handiwork!
How to Store \u0026 Reheat
Store the assembled cake in an airtight container in the refrigerator, due to the fresh cream, and consume within 2-3 days. The sponges themselves, before filling, can be stored in an airtight container at room temperature for up to 3 days, or wrapped tightly and frozen for up to 1 month. Thaw them completely at room temperature before filling and serving. This cake is not suitable for reheating once assembled.
Mary's Secrets to Success
For a truly magnificent result, always ensure your butter is beautifully soft before you begin. This allows it to cream wonderfully with the sugar, incorporating air and giving you that lovely light texture we all adore. And don't forget to line your tins properly – a little parchment goes a long way in ensuring your cakes turn out perfectly every time. It's these little details that make all the difference to sheer perfection!
Frequently Asked Questions
Why did my sponge sink in the middle?
Oh dear, that can be disappointing! This often happens if the oven door is opened too early during baking, causing a sudden drop in temperature, or if the cake is underbaked. Ensure your oven is at the correct temperature and resist the urge to peek until the last 10 minutes of baking. Also, do check that your baking powder isn't past its best before date, as it loses its potency over time.
Can I make this gluten-free?
Absolutely! You can certainly adapt this recipe. Simply substitute the self-raising flour with a good quality gluten-free self-raising flour blend (these often include xanthan gum to aid texture) and follow the rest of the instructions as written. The texture might be ever so slightly different, but it will still be utterly delicious and a real treat for those with dietary needs.
My cake turned out dry, what went wrong?
A dry cake often means it's been overbaked, my dear. Keep a very close eye on your oven and test for doneness with a light touch – it should spring back gently. Also, ensure your butter is truly softened, not melted, and that you're measuring your flour accurately. Overmixing the batter after adding flour can also develop the gluten too much, leading to a tougher, drier crumb.
Can I use different sized tins?
You certainly can, but you'll need to adjust the quantities and baking time accordingly. For smaller tins (e.g., 8-inch), you might reduce the ingredients by about 20-25% and bake for a slightly shorter time. For larger tins, you'd need more ingredients and potentially longer baking. Always keep an eye on it and adjust the cooking time until a skewer comes out clean.
What's the secret to a perfectly light sponge?
The key, my dear, is in the preparation of your ingredients and not overmixing! Always ensure your butter and eggs are at room temperature – this helps them to emulsify beautifully and incorporate air. And once the flour is added, mix only until just combined; overmixing develops the gluten and can lead to a tougher cake, rather than that wonderful light texture we all adore. It's truly a matter of gentle hands and a keen eye!
Useful Baking Tools
Wrong tin size, a fan oven, or ingredients in cups or ounces? Convert everything first with our free tools: