Mary Berry Recipes
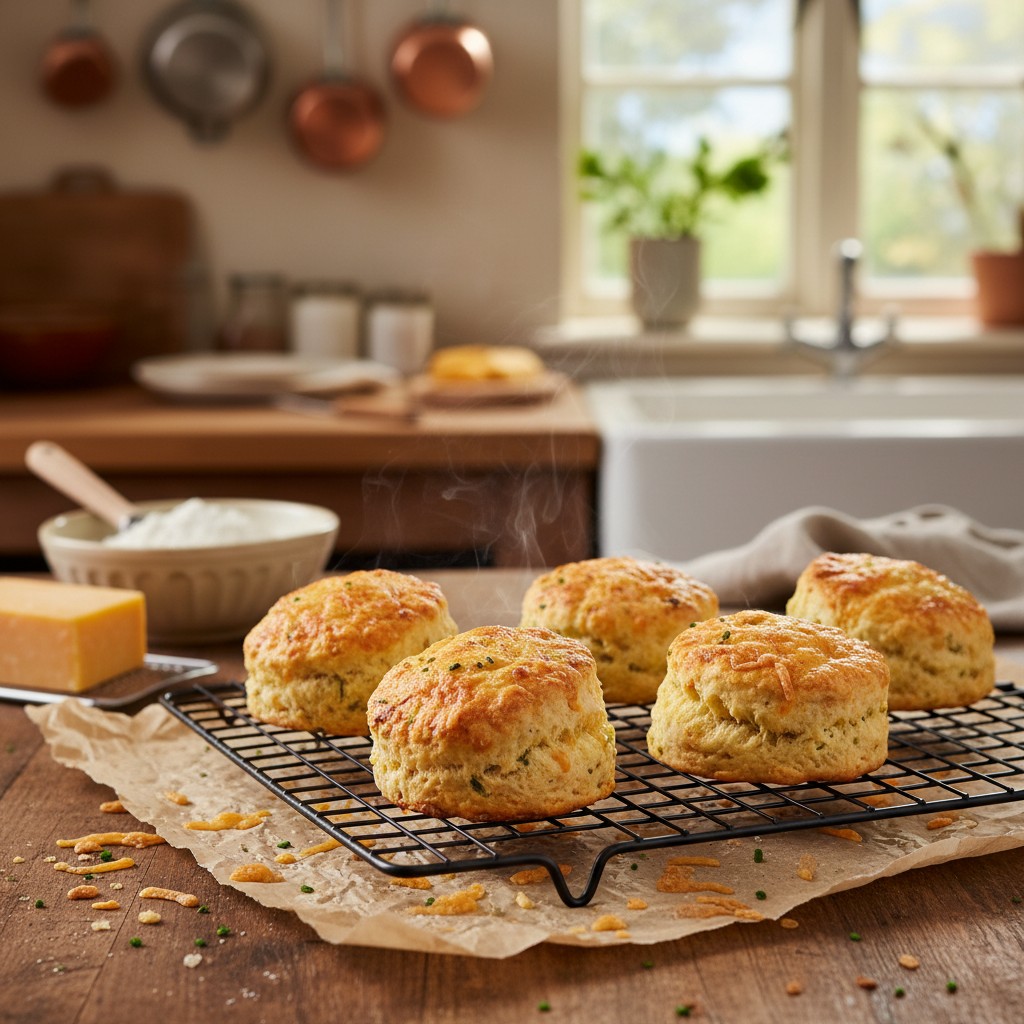
Classic Savoury Cheese Scones
These classic cheese scones are wonderfully simple to bake and deliver sheer perfection every time. Light, fluffy, and bursting with savoury flavour, they're a true delight for any occasion.
Why You'll Love This Recipe
- The combination of self-raising flour and a light touch ensures a wonderfully airy and fluffy texture.
- Using cold butter and milk helps create steam in the oven, contributing to a perfect rise and tender crumb.
- A generous amount of mature cheddar provides a rich, savoury flavour that is simply irresistible and perfectly balanced.
Ingredients
- 450g (1lb) self-raising flour
- 1 level teaspoon baking powder
- 1/2 level teaspoon salt
- 100g (4oz) cold butter, cut into cubes
- 100g (4oz) mature cheddar cheese, grated
- 200ml (7fl oz) milk, plus a little extra for glazing
- 1 egg, beaten (for egg wash, optional)
Equipment Needed
Large mixing bowl • Sieve • Baking tray • Round-bladed knife • Rolling pin • 5-6cm (2-inch) round cutter • Pastry brush (optional, for glazing) • Wire rack
Step-by-Step Instructions
- Preheat your oven to 220°C (200°C Fan / Gas Mark 7). Lightly grease a large baking tray.
- Sift the self-raising flour, baking powder, and salt into a large mixing bowl. This step is absolutely essential for a light scone, you see.
- Add the cold, cubed butter to the flour mixture. Using your fingertips, gently rub the butter into the flour until the mixture resembles fine breadcrumbs. Remember, a light touch is key here; we don't want to overwork the butter.
- Stir in three-quarters of the grated cheddar cheese. Keep the remaining cheese aside for sprinkling on top later.
- Make a well in the centre of the mixture and gradually pour in the milk. Mix with a round-bladed knife, bringing the dough together until it forms a soft, slightly sticky ball. Don't be tempted to add all the milk at once; you might not need it all, or you might need a tiny splash more, depending on your flour.
- Turn the dough out onto a lightly floured surface. Knead very gently for just a few seconds until it's smooth. Over-kneading will make your scones tough, and we certainly don't want that!
- Roll out the dough to a thickness of about 2cm (3/4 inch). Using a 5-6cm (2-inch) fluted or plain cutter, cut out as many scones as you can. Do press firmly downwards and lift straight up – twisting the cutter seals the edges and can prevent a good rise.
- Carefully place the scones onto your prepared baking tray. Brush the tops with a little milk or the beaten egg for a lovely golden glaze, then sprinkle with the remaining grated cheese.
- Bake in the preheated oven for 12-15 minutes, or until they are well-risen and golden brown on top. They should sound hollow when tapped on the bottom. Now, that's what I call sheer perfection!
- Remove from the oven and transfer to a wire rack to cool slightly before serving. These are best enjoyed warm, fresh from the oven.
How to Store \u0026 Reheat
To keep your cheese scones at their best, store them in an airtight container at room temperature for up to 2-3 days. They tend to lose a little of their freshness quickly, so I always recommend enjoying them on the day they are baked if possible. To reheat, simply pop them into a preheated oven at 160°C (140°C Fan / Gas Mark 3) for about 5-7 minutes, or until warmed through. You can also warm them gently in a microwave for 20-30 seconds, though this can sometimes make them a little softer rather than crisping the outside.
Mary's Secrets to Success
For truly light and fluffy cheese scones, always remember these golden rules: ensure your butter is very cold and handle the dough as little as possible. Overworking the dough is the enemy of a tender scone! When cutting, press straight down with your cutter, never twist, as this seals the edges and can hinder the rise. And finally, bake them in a hot oven until they are beautifully golden and sound hollow when tapped – that's the sign of sheer perfection!
Frequently Asked Questions
Why are my cheese scones tough?
Ah, the secret to a tender scone, you see, is a very light touch! The most common reason for tough scones is overworking the dough. Once the milk is added, mix it just until it comes together, and then knead for only a few seconds. Over-handling develops the gluten too much, resulting in a chewy rather than fluffy scone.
Can I freeze cheese scones?
Absolutely! Cheese scones freeze beautifully. Once baked and completely cooled, place them in a single layer in an airtight container or freezer bag. They will keep well for up to 3 months. To enjoy, simply thaw at room temperature and then warm through in a moderate oven for that 'just baked' taste.
What's the best way to get a good rise?
Several things contribute to a splendid rise! Firstly, ensure your self-raising flour and baking powder are fresh. Secondly, use very cold butter and milk, as this creates steam in the oven. Thirdly, don't twist your cutter when cutting out the scones; press straight down and lift straight up to avoid sealing the edges. Finally, bake them in a hot oven quickly.
Can I add other ingredients to my cheese scones?
Oh, certainly! While the classic is wonderful, you can absolutely get creative. A pinch of cayenne pepper or mustard powder can add a lovely warmth. Finely chopped spring onions, chives, or even a little crispy bacon can be folded in with the cheese for an extra flavour dimension. Do adjust the liquid slightly if adding wet ingredients.
How do I avoid a 'soggy bottom' on my scones?
A 'soggy bottom' is something we absolutely want to avoid! The key is to ensure your oven is at the correct temperature and that your baking tray is hot enough. Also, ensure there's good air circulation around the scones. Baking them on a preheated, unlined tray often helps. And once out of the oven, transfer them to a wire rack immediately to allow air to circulate all around, preventing steam from condensing underneath.