Mary Berry Recipes
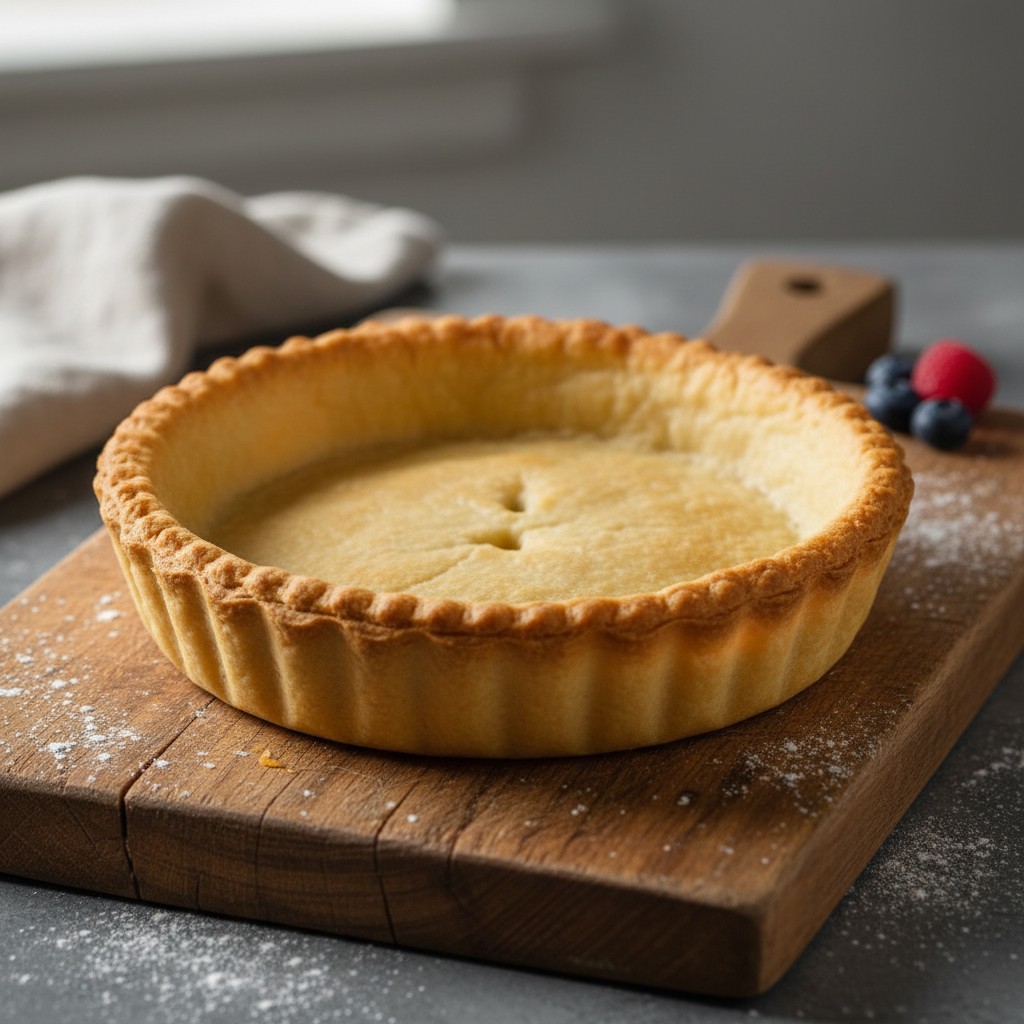
Classic Shortcrust Pastry
Crafting a truly wonderful shortcrust pastry is a joy, and with my recipe, you'll find it wonderfully simple. This versatile foundation is the secret to countless delicious pies and tarts, both sweet and savoury.
Why You'll Love This Recipe
- Uses readily available, simple ingredients for a truly authentic taste.
- A reliable, tried-and-true method that guarantees consistent results every time.
- Remarkably versatile, perfect for both sweet and savoury fillings, making it a staple in any kitchen.
Ingredients
- 225g (8 oz) plain flour, plus extra for dusting
- Pinch of salt
- 100g (4 oz) cold unsalted butter, cut into small cubes
- 2-3 tablespoons very cold water
Equipment Needed
Large mixing bowl • Sieve • Rolling pin • Cling film
Step-by-Step Instructions
- Begin by sieving the plain flour and a pinch of salt into a large mixing bowl. This aerates the flour and prevents any lumps.
- Add the cold, cubed butter to the flour. Now, using your fingertips, gently rub the butter into the flour until the mixture resembles fine breadcrumbs. It's crucial to work quickly here to keep the butter as cold as possible; warm butter will result in a less flaky pastry.
- Gradually add the very cold water, one tablespoon at a time. Use a blunt-ended knife or your hand to mix the water in until the dough just comes together. Be careful not to add too much water, and avoid overworking the dough, as this can make the pastry tough.
- Once the dough has formed, gather it into a ball, then gently flatten it into a disc. Wrap the disc tightly in cling film.
- Place the wrapped pastry in the refrigerator and chill for at least 30 minutes. This resting period is essential as it allows the gluten to relax, making the pastry much easier to roll and preventing shrinkage during baking.
- When you're ready to use it, lightly flour your work surface and your rolling pin. Roll out the pastry to your desired thickness and size, turning it frequently to prevent sticking. Use it immediately for your chosen recipe, be it a glorious pie, a delightful tart, or a savoury quiche.
How to Store \u0026 Reheat
Unused pastry dough can be wrapped tightly in cling film and stored in the refrigerator for up to 3 days. For longer storage, it freezes beautifully for up to 3 months; just be sure to thaw it overnight in the refrigerator before using. Baked pies and tarts should be stored in an airtight container at room temperature for 2-3 days, or refrigerated if they contain dairy, meat, or fresh fruit. Reheat savoury items gently in a moderate oven until warmed through, if desired.
Mary's Secrets to Success
My top tips for truly successful shortcrust pastry are all about temperature and gentle handling. Firstly, keep everything *cold*: your butter, your water, and even your hands if you can! This ensures those lovely pockets of butter melt slowly during baking, creating that wonderfully flaky texture. Secondly, resist the urge to overwork the dough; the less you handle it, the more tender your pastry will be. And finally, don't skip the chilling step – it allows the gluten to relax, making your pastry much easier to roll and preventing any unwelcome shrinkage in the oven. Follow these simple rules, and you'll achieve sheer perfection every time!
Frequently Asked Questions
How do I prevent a 'soggy bottom' on my pies?
Ah, the dreaded soggy bottom! The secret here is blind baking. Line your pastry case with baking paper, fill it with ceramic baking beans or dried pulses, and bake it in a hot oven until it's firm and pale. Remove the beans and paper, then bake for a few more minutes until it's lightly golden. This creates a wonderful, crisp base ready for your filling.
Why does my pastry sometimes come out tough?
Tough pastry is usually a sign of overworking the dough. When you handle the dough too much, you develop the gluten in the flour, which leads to a chewy, rather than tender, texture. Always work quickly and handle the dough as little as possible. Also, adding too much water can contribute to toughness, so add it gradually.
Can I make this pastry in a food processor?
Absolutely, a food processor is a marvellous tool for making pastry quickly! Simply pulse the flour, salt, and cold butter until it resembles fine breadcrumbs. Then, with the motor running, slowly add the very cold water through the feeder tube, a tablespoon at a time, until the dough just comes together. Be careful not to over-process.
My pastry cracks when I'm rolling it out. What should I do?
If your pastry is cracking, it's likely either too cold or a little too dry. Allow it to warm up slightly at room temperature for 5-10 minutes, which will make it more pliable. If it feels particularly dry, you can sprinkle a tiny bit more very cold water over it and gently knead it in a couple of times before rolling again.
Is it possible to make a gluten-free shortcrust pastry with this method?
Indeed, it is! You can certainly adapt this recipe by using a good quality gluten-free plain flour blend. You might find you need a tiny bit more water, and it's even more important to handle the dough very gently, as gluten-free pastries can sometimes be a little more fragile. The principles of keeping ingredients cold and not overworking remain the same.