Mary Berry Recipes
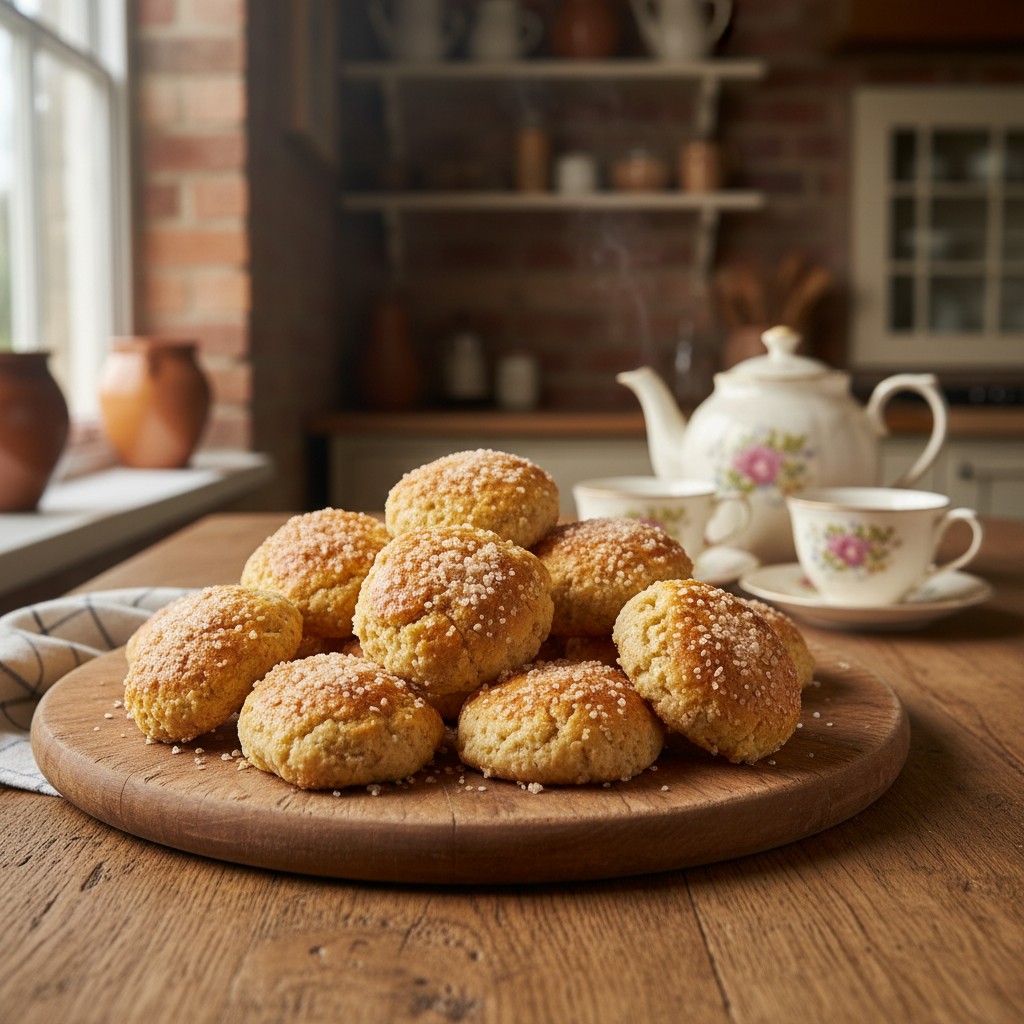
Classic British Rock Buns: A Timeless Tea-Time Treat
Delightfully rustic and wonderfully simple, these classic rock buns are a true taste of British baking. Perfect for a quick treat with your afternoon tea, they're sure to bring a smile to everyone's face.
Why You'll Love This Recipe
- Wonderfully quick to prepare, ideal for last-minute guests or an impromptu tea party.
- Uses simple, readily available pantry ingredients you likely already have on hand.
- The rustic, craggy texture is incredibly satisfying and charmingly authentic.
- A delightful and comforting accompaniment to a cup of tea or coffee.
- A truly timeless British classic that never disappoints and is easy to master.
Ingredients
- 225g (8oz) self-raising flour
- 50g (2oz) cold butter, cubed
- 50g (2oz) caster sugar
- 50g (2oz) currants or mixed dried fruit
- Pinch of mixed spice (optional, but highly recommended for warmth)
- 1 medium egg, beaten
- Approximately 2-3 tbsp milk
- A little extra milk or beaten egg for glazing (optional)
- Demerara sugar for sprinkling (optional, for a lovely crunch)
Equipment Needed
Large mixing bowl • Sieve • Baking tray • Wire cooling rack • Dessert spoons • Pastry brush (optional, for glazing)
Step-by-Step Instructions
- Preheat your oven to 190°C (170°C fan/Gas 5). Lightly grease a large baking tray or line it with baking parchment.
- Sift the self-raising flour into a large mixing bowl. Add the cold, cubed butter.
- Using your fingertips, gently rub the butter into the flour until the mixture resembles fine breadcrumbs. This step is crucial for a tender bun, so be light-handed!
- Stir in the caster sugar, dried fruit (currants or mixed fruit), and the pinch of mixed spice, if you're using it. Ensure everything is well distributed.
- In a separate bowl, lightly beat the egg. Make a well in the centre of the flour mixture and pour in the beaten egg, along with 2 tablespoons of milk.
- Mix with a knife or your hand, gradually bringing the mixture together to form a stiff, but not dry, dough. If it's too crumbly, add a tiny bit more milk, half a tablespoon at a time, until it just comes together. Avoid overworking the dough.
- Using two dessert spoons, drop rough, craggy spoonfuls of the dough onto the prepared baking tray. Don't try to make them neat or uniform; their 'rock-like' appearance is part of their charm!
- If desired, brush the tops of the buns with a little extra milk or beaten egg for a lovely golden glaze, and sprinkle generously with demerara sugar for a wonderful crunch.
- Bake in the preheated oven for 12-15 minutes, or until they are beautifully golden brown and sound hollow when tapped on the bottom.
- Remove from the oven and transfer the rock buns to a wire cooling rack to cool completely. They are truly delicious served warm, but equally lovely once cooled.
How to Store \u0026 Reheat
Rock buns are truly at their best on the day they are baked, when their crumb is at its freshest. Store any leftovers in an airtight container at room temperature for up to 2-3 days. If they've lost a little freshness, a quick warm-through in a moderate oven for 5-7 minutes will revive them beautifully, making them wonderfully tender again. They don't freeze particularly well due to their crumbly nature, but if you must, freeze them unglazed and un-sprinkled, then thaw and warm gently.
Mary's Secrets to Success
Now, for my little secrets to achieving truly perfect rock buns, every single time: * **Cold Butter is Best:** Do ensure your butter is lovely and cold when you rub it into the flour; this creates those essential pockets of fat that give the buns their wonderful crumbly texture. * **A Light Hand, Always:** Don't overmix the dough. As soon as it comes together into a stiff consistency, stop. Overworking will develop the gluten too much, leading to tough buns. * **Embrace the Cragginess:** Resist the urge to make them perfectly round or smooth. Their rustic, 'rock-like' appearance is part of their charm and their name! * **Watch the Oven:** Rock buns bake relatively quickly. Keep a close eye on them; you want them beautifully golden, not overly browned, to ensure they remain tender inside. * **The Demerara Touch:** For an extra touch of sparkle and a delightful crunch on top, don't forget that sprinkle of demerara sugar before they go into the oven.
Frequently Asked Questions
Why are they called 'rock buns'?
They get their charming name from their wonderfully rustic, uneven, and craggy appearance, rather than being smooth or perfectly shaped. It's their unique character!
Can I add different fruits or nuts to the recipe?
Absolutely! While currants are traditional, you can certainly experiment. A mix of dried cranberries and orange zest, or even a few chopped walnuts, would be quite lovely. Just ensure the total quantity of additions remains similar to avoid altering the dough's consistency too much.
My rock buns turned out dry or hard, what went wrong?
This usually happens if the dough has been overworked, too much flour was used, or they were baked for too long. Remember, a light hand is key when mixing, and keep a close eye on them in the oven to ensure they're just golden.
How do I get that lovely craggy top?
The trick is not to try and smooth them! Simply use two dessert spoons to drop rough, uneven mounds of dough onto your baking tray. Their natural, rustic shape is what gives them their distinctive 'rock-like' appearance.
Can I make these dairy-free?
Yes, you certainly can! Substitute the butter with a good quality plant-based baking block or margarine, and use a plant-based milk alternative (such as oat or almond milk) in the same quantities. The result will still be wonderfully delicious.