Mary Berry Recipes
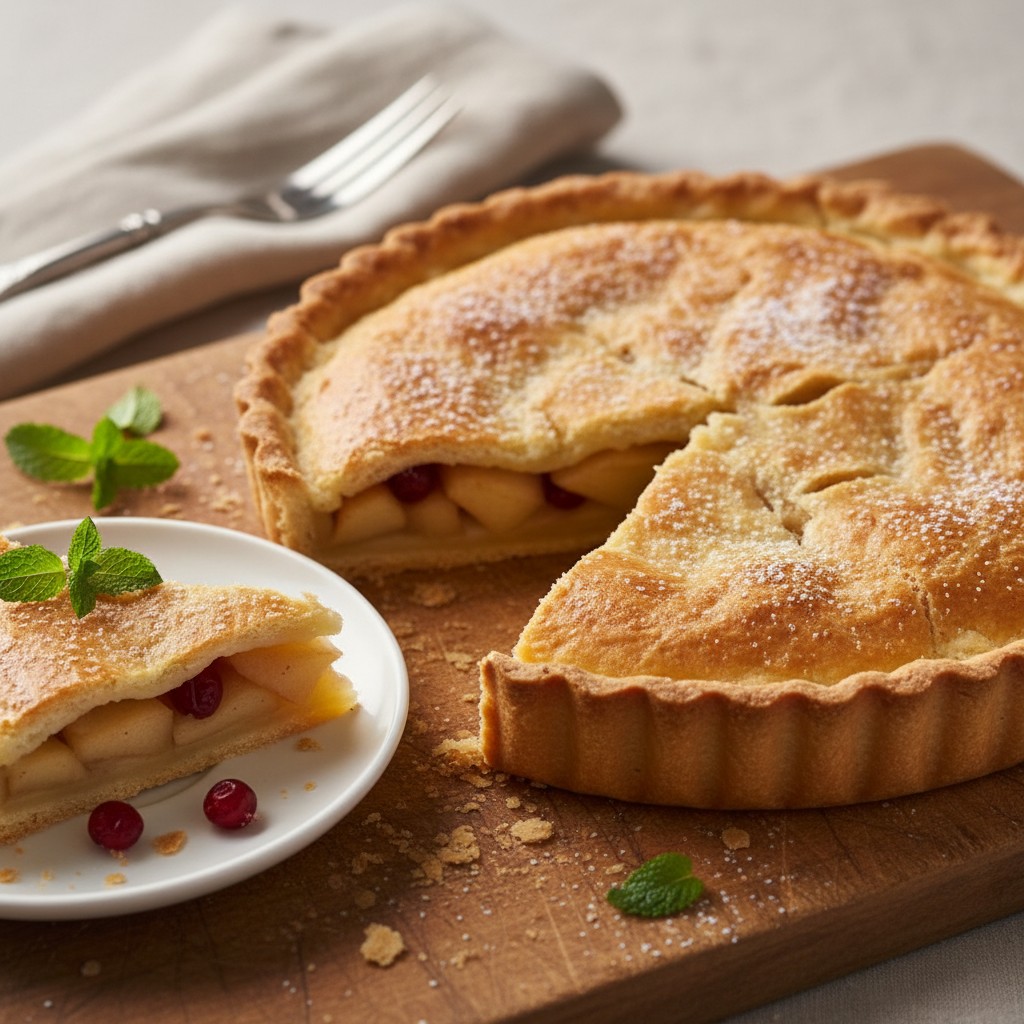
Classic All-Butter Shortcrust Pastry
A truly magnificent shortcrust pastry is the foundation of so many wonderful bakes, both sweet and savoury. My recipe promises a delicate, crumbly texture every single time, making it a sheer delight to work with.
Why You'll Love This Recipe
- Uses only a few simple, high-quality ingredients for superior flavour and texture.
- The method ensures a light, crumbly, and tender pastry, never tough or heavy.
- It's wonderfully versatile, perfect for both sweet and savoury fillings, making it a true kitchen staple.
Ingredients
- 225g (8oz) plain flour, plus extra for dusting
- Pinch of salt
- 110g (4oz) unsalted butter, very cold and cut into small cubes
- 2-3 tablespoons very cold water
Equipment Needed
Large mixing bowl • Sieve • Knife (or food processor) • Cling film • Rolling pin
Step-by-Step Instructions
- **Prepare the Dry Ingredients:** Begin by sifting the plain flour into a large mixing bowl. Add a pinch of salt and give it a good stir with your fingertips to combine. This ensures even distribution and a lovely flavour.
- **Add the Butter:** Now, add the very cold, cubed butter to the flour. Using your fingertips, gently rub the butter into the flour until the mixture resembles fine breadcrumbs. The key here is to work quickly and lightly, to prevent the butter from melting too much – cold butter is essential for that wonderful flaky texture. You can also use a food processor for this step, pulsing briefly until just combined.
- **Bring Together with Water:** Make a well in the centre of the breadcrumb mixture. Add 2 tablespoons of very cold water, a little at a time, mixing with a knife to bring the dough together. If it feels too dry, add the third tablespoon of water, a teaspoon at a time, until the dough just comes together. Be careful not to add too much water, as this can make the pastry tough.
- **Form the Dough:** Once the dough has just come together, gently bring it into a ball using your hands. Avoid kneading it excessively, as overworking the dough develops the gluten, leading to a tough pastry.
- **Chill the Dough:** Flatten the dough into a disc, wrap it tightly in cling film, and place it in the refrigerator for at least 30 minutes. This chilling period is crucial; it allows the gluten to relax, making the pastry easier to roll, and prevents shrinkage during baking.
- **Roll Out (When Ready to Use):** Once chilled, lightly flour a clean work surface and your rolling pin. Roll out the pastry to your desired thickness, turning it frequently to prevent sticking. Use it immediately for your chosen sweet or savoury recipe.
How to Store \u0026 Reheat
Unbaked Pastry: The raw pastry dough can be wrapped tightly in cling film and stored in the refrigerator for up to 3 days. It can also be frozen for up to 3 months; simply thaw in the refrigerator overnight before use. Baked Pastry (e.g., a pie): Once baked into a pie or tart, store leftovers covered in the refrigerator for 2-3 days. Reheat gently in a moderate oven (160°C/325°F) until warmed through, or enjoy cold.
Mary's Secrets to Success
My dears, the secret to truly excellent shortcrust pastry lies in two key things: keeping everything very, very cold, and handling the dough as little as possible. Cold butter creates those lovely pockets of steam that give us flakiness, and a light touch prevents the gluten from developing too much, ensuring a wonderfully tender pastry. Don't be afraid to use a food processor for the 'rubbing in' stage if you have warm hands; it's a brilliant shortcut! And remember, patience with chilling will always reward you with a dough that rolls beautifully and bakes to sheer perfection.
Frequently Asked Questions
How do I prevent my pastry from shrinking in the oven?
The most common reason for shrinkage is not chilling the pastry sufficiently. Ensure you chill the dough for at least 30 minutes, or even longer, after making it and again after lining your tin. This allows the gluten to relax, which prevents it from contracting in the heat of the oven. Also, avoid stretching the pastry when lining the tin.
My pastry is tough, what went wrong?
Tough pastry is usually a sign of overworking the dough or adding too much water. When rubbing in the butter, work quickly and lightly. When adding water, incorporate it gradually until the dough just comes together, and avoid kneading.
Can I make this pastry gluten-free?
Certainly! While this classic recipe uses plain flour, you can adapt it by using a good quality gluten-free plain flour blend. You might find you need slightly more or less water, so add it cautiously until the dough comes together. The texture will be a little different, but still delicious.
Do I need to blind bake my pastry?
For many tarts and quiches, blind baking is indeed essential to prevent a 'soggy bottom,' especially if your filling is wet or has a short cooking time. Simply line your pastry case with baking parchment, fill with baking beans or rice, and bake for about 15-20 minutes until the edges are set. Then remove the beans and bake for a further 5-10 minutes until lightly golden.
My pastry keeps cracking when I roll it out. What should I do?
This often happens if the dough is too cold or hasn't had enough time to rest. If it's too cold, let it sit at room temperature for 5-10 minutes before rolling. If it still cracks, gently press the cracks together with your fingers or a little bit of leftover dough. A little flexibility comes with sufficient chilling and then allowing it to warm slightly before rolling.