Mary Berry Recipes
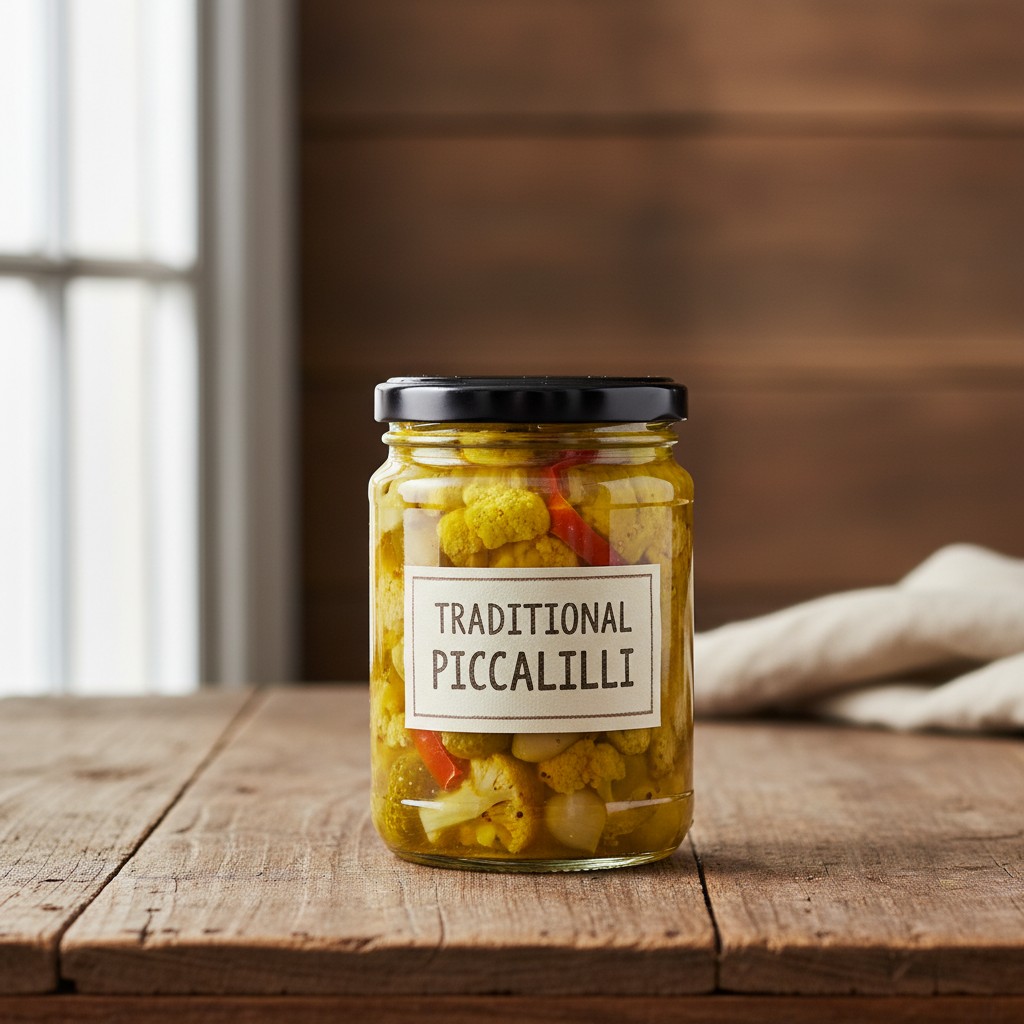
Classic British Piccalilli
A vibrant, tangy condiment that brings a burst of flavour to any plate, this Piccalilli recipe is a true British classic. It's wonderfully simple to make and will become a firm family favourite, I promise you.
Why You'll Love This Recipe
- Uses a classic balance of aromatic spices for an authentic, warm flavour.
- The crucial brining process ensures the vegetables remain wonderfully crisp and crunchy.
- It's a fantastic, economical way to preserve a bounty of garden produce, lasting for months.
Ingredients
- 450g cauliflower, cut into small florets
- 225g small gherkins, sliced or chopped
- 225g pickling onions, peeled and quartered
- 225g green beans, trimmed and cut into 2cm pieces
- 175g coarse sea salt
- 1.2 litres malt vinegar
- 450g granulated sugar
- 60g mustard powder
- 2 tablespoons plain flour
- 1 tablespoon ground turmeric
- 1 teaspoon ground ginger
- 1 teaspoon curry powder (mild)
- Pinch of cayenne pepper (optional)
Equipment Needed
Very large mixing bowl • Large, non-reactive saucepan (stainless steel or enamelled) • Colander • Whisk • Measuring jugs and spoons • Sharp knife and chopping board • Clean tea towels • 4-5 x 450g sterilised jars with lids • Ladle or large spoon for filling jars
Step-by-Step Instructions
- First, dear, let's prepare our lovely vegetables. In a very large bowl, combine the cauliflower, gherkins, onions, and green beans. Sprinkle over the coarse sea salt, ensuring everything is well coated. Pour over 600ml of the malt vinegar, stir gently, then cover and leave to brine in a cool place for 12-24 hours. This step is absolutely crucial for that wonderful crunch!
- After the brining period, drain the vegetables thoroughly in a colander. Rinse them very well under cold running water to remove excess salt, then drain again and pat them dry with a clean tea towel. Set aside.
- Now, for the glorious sauce! In a large, non-reactive saucepan, combine the remaining 600ml of malt vinegar with the granulated sugar. Bring this gently to a simmer over a medium heat, stirring until the sugar has completely dissolved. Remove from the heat for a moment.
- In a separate bowl, whisk together the mustard powder, plain flour, turmeric, ground ginger, curry powder, and cayenne pepper (if using) with a little splash of cold water to form a smooth paste. This is important to avoid any lumps, you see.
- Gradually whisk the spice paste into the warm vinegar and sugar mixture in the saucepan. Return the saucepan to a medium heat and bring it to a boil, stirring constantly. Reduce the heat and simmer gently for about 5-7 minutes, continuing to stir, until the sauce has thickened beautifully and is lovely and glossy.
- Add the drained and dried vegetables to the thickened sauce. Stir well to coat all the vegetables evenly. Bring the mixture back to a gentle simmer and cook for another 5-10 minutes, or until the vegetables are tender-crisp. We don't want them soft, just a little give, keeping that delightful bite.
- While your piccalilli is simmering, ensure your jars are perfectly sterilised. Wash them in hot, soapy water, rinse well, then place them upside down on a baking tray in a cold oven. Heat the oven to 130°C (110°C fan/Gas 1) for 15-20 minutes. Keep them hot until ready to fill.
- Carefully spoon the hot piccalilli into your hot, sterilised jars, filling them right to the brim. Seal immediately with sterilised lids. As they cool, you should hear that satisfying 'pop' as the vacuum seal forms.
- Allow the piccalilli to cool completely. Store in a cool, dark place for at least 2-4 weeks before opening to allow the flavours to develop wonderfully. It's well worth the wait, I promise!
How to Store \u0026 Reheat
Once your jars are sealed and cool, store them in a cool, dark pantry or cupboard. Your homemade Piccalilli will keep beautifully for up to a year. Once a jar is opened, it must be stored in the refrigerator and enjoyed within 4-6 weeks. As it's a pickle, there's no need for reheating; it's best served straight from the jar, chilled or at room temperature.
Mary's Secrets to Success
Ah, the little secrets that make all the difference! Firstly, do ensure your vegetables are cut into uniform pieces; this helps them cook evenly and look so much more appealing in the jar. Secondly, the brining stage, though it takes time, is absolutely crucial for that wonderful crunch – don't be tempted to rush it, dear. And finally, when you're simmering your sauce, keep stirring gently to prevent any lumps, ensuring a beautifully smooth and glossy finish. Sterilising your jars properly is also paramount for good keeping, of course!
Frequently Asked Questions
Can I use different vegetables in my Piccalilli?
Absolutely! While cauliflower, gherkins, and onions are traditional, you can certainly experiment. Try adding some courgette, bell peppers, or even green tomatoes. Just ensure they are cut to a similar size for even brining and cooking, my dear.
Why do I need to brine the vegetables?
Brining with salt draws out excess moisture from the vegetables, which is essential for two reasons: it helps to keep them wonderfully crisp and prevents the piccalilli from becoming watery, ensuring a thick, luscious sauce. It's a crucial step, so please don't skip it!
How long does homemade Piccalilli last?
When properly sterilised and sealed, your homemade Piccalilli will keep for up to a year in a cool, dark pantry. Once opened, store it in the refrigerator and enjoy it within 4-6 weeks for the best flavour and texture.
My Piccalilli is too thin/thick, what went wrong?
If it's too thin, it might be that the flour wasn't fully incorporated, or perhaps the vegetables weren't brined sufficiently, releasing too much liquid. If it's too thick, you might have reduced the vinegar mixture too much or added a little too much flour. Don't fret, a slightly thinner piccalilli is still utterly delicious, and a thicker one can be loosened with a tiny splash of extra vinegar if needed. It's all part of the learning curve!
What's the best way to sterilise jars?
My preferred method is to wash the jars and lids in hot, soapy water, rinse them well, and then place them upside down on a baking tray in a cold oven. Heat the oven to 130°C (110°C fan/Gas 1) for 15-20 minutes. Remove them carefully, keeping them hot until ready to fill. You can also run them through a hot cycle in your dishwasher; just ensure they are bone dry and piping hot when you fill them.