Mary Berry Recipes
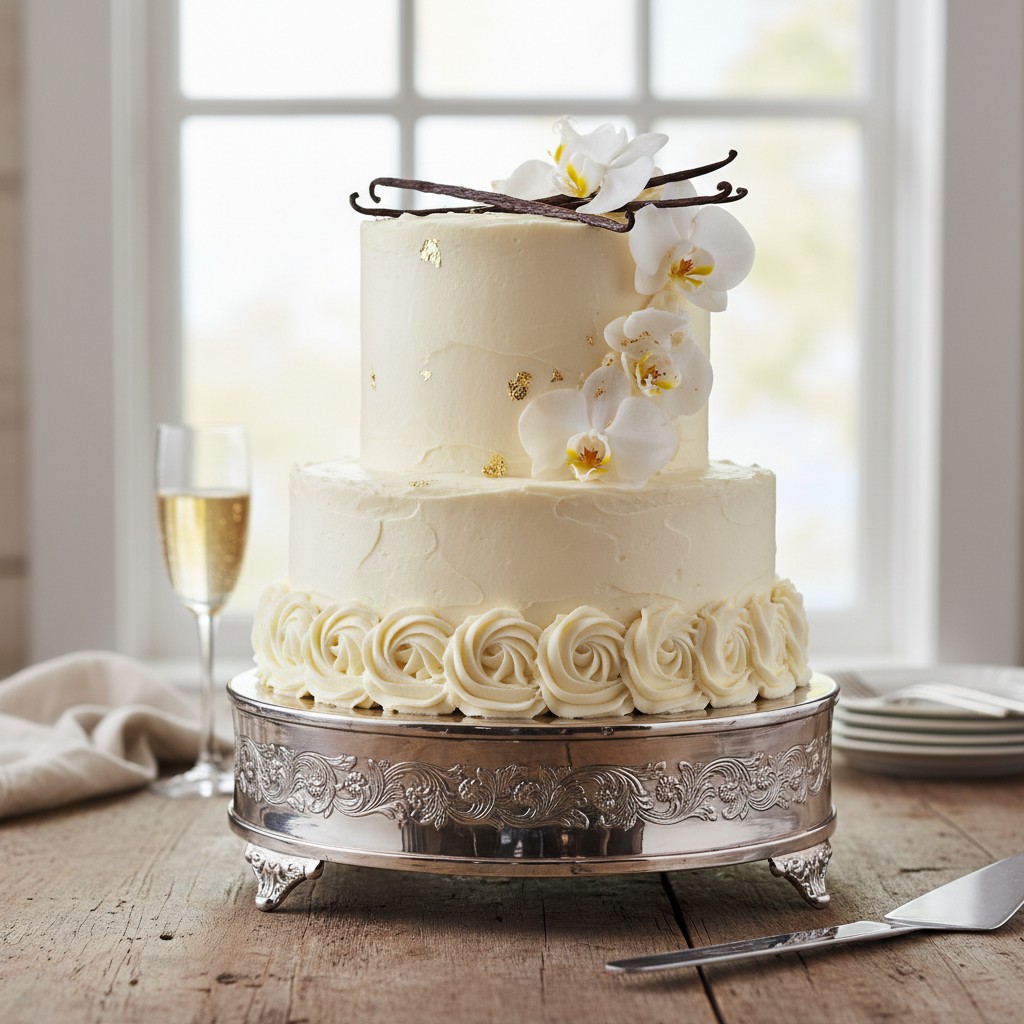
Elegant Vanilla Celebration Cake
This beautiful vanilla cake is a sheer delight, offering a light, tender crumb and a flavour that truly sings. It's a wonderfully versatile recipe, perfect for any special occasion or simply to brighten a family tea.
Why You'll Love This Recipe
- Uses readily available, simple ingredients, ensuring a reliable and accessible bake for everyone.
- The 'all-in-one' method, or a gentle creaming method, ensures a consistently light and tender crumb without fuss.
- This base recipe is incredibly versatile, allowing you to adapt it with various fillings and frostings for any occasion.
Ingredients
- For the Cake:
- 225g (8oz) unsalted butter, softened
- 225g (8oz) caster sugar
- 4 large free-range eggs, at room temperature
- 225g (8oz) self-raising flour, sifted
- 1 teaspoon baking powder
- 2-3 tablespoons whole milk, at room temperature
- 2 teaspoons good quality vanilla extract
- For the Vanilla Buttercream:
- 150g (5oz) unsalted butter, softened
- 300g (11oz) icing sugar, sifted
- 1-2 tablespoons whole milk
- 1 teaspoon vanilla extract
Equipment Needed
Two 20cm (8-inch) round sandwich tins • Baking parchment • Large mixing bowl • Electric mixer (optional, but helpful) • Sieve • Rubber spatula or wooden spoon • Wire cooling rack • Measuring spoons and cups
Step-by-Step Instructions
- Preheat your oven to 180°C (160°C fan/Gas Mark 4). Grease and line two 20cm (8-inch) round sandwich tins with baking parchment. This ensures your cakes will release beautifully.
- In a large mixing bowl, cream together the softened butter and caster sugar until the mixture is light and fluffy. This is a crucial step for a light cake, so don't rush it! Use an electric mixer if you have one.
- Gradually beat in the eggs, one at a time, adding a spoonful of the sifted flour with each egg to prevent the mixture from curdling. Once all eggs are incorporated, gently fold in the remaining self-raising flour and baking powder.
- Add the milk and vanilla extract, then fold gently until just combined. Be careful not to overmix, my dears, as this can make your cake tough. We want it light as a feather!
- Divide the mixture evenly between your prepared cake tins. Smooth the tops gently with the back of a spoon.
- Bake for 25-30 minutes, or until the cakes are golden brown and spring back when lightly pressed in the centre. A skewer inserted into the middle should come out clean. My little secret is to always check a minute or two before the suggested time, just to be sure.
- Allow the cakes to cool in their tins for 5-10 minutes before turning them out onto a wire rack to cool completely. Patience is a virtue here; a warm cake will melt your beautiful buttercream!
- While the cakes are cooling, prepare the buttercream. Beat the softened butter in a bowl until very light and creamy. Gradually add the sifted icing sugar, beating well after each addition. This creates a wonderfully smooth texture.
- Once all the icing sugar is incorporated, beat in the milk and vanilla extract until the buttercream is light, fluffy, and spreadable. If it's too stiff, add a tiny bit more milk; if too soft, a little more icing sugar.
- Once the cakes are completely cold, spread half of the buttercream over the top of one cake. Carefully place the second cake on top, then spread the remaining buttercream over the top of the second cake. You can leave the sides plain for a rustic look or spread a thin layer around the sides too.
- Decorate as desired – perhaps a scattering of fresh berries, a few edible flowers, or simply leave it as is. This cake is a real family favourite, wonderful just as it is. Serve and enjoy!
How to Store \u0026 Reheat
This beautiful cake will keep wonderfully in an airtight container at room temperature for up to 3-4 days. If the weather is particularly warm, you might pop it into the refrigerator, but do allow it to come back to room temperature before serving for the best texture and flavour. I don't recommend reheating cake, as it can dry out the delicate crumb. This cake also freezes beautifully, unfrosted or frosted (though the frosting texture might change slightly). Wrap individual slices or whole layers tightly in cling film and then foil, and freeze for up to 2-3 months. Thaw completely at room temperature before serving.
Mary's Secrets to Success
My secrets to success for this delightful cake are quite simple, really. Firstly, ensure all your ingredients, especially the butter and eggs, are at room temperature. This helps them emulsify beautifully, creating a smoother batter and a finer crumb. Secondly, don't be tempted to overmix the batter once the flour is added; a gentle fold is all that's needed to keep it light and airy. And finally, always trust your oven – get to know its quirks, and remember that baking times are a guide. A perfectly baked cake will spring back when lightly pressed and a skewer will come out clean. Happy baking, my dears!
Frequently Asked Questions
How can I ensure my cake is perfectly white and not yellowish?
For a truly 'white' cake, some recipes call for only egg whites. However, this classic recipe uses whole eggs, giving it a light, golden vanilla hue which is perfectly traditional. To keep it as light as possible, ensure you use good quality vanilla extract (clear if you can find it, though standard extract won't dramatically alter the colour) and avoid any ingredients with strong colours.
My cake sank in the middle, what went wrong?
Oh dear! This can happen for a few reasons. Often, it's due to opening the oven door too early, before the cake is set. It could also be overmixing the batter, which develops the gluten too much, or using too much baking powder. Ensure your oven temperature is accurate and resist the urge to peek until at least two-thirds of the baking time has passed.
Can I make this cake ahead of time for a special occasion?
Absolutely! The unfrosted cake layers can be baked a day or two in advance. Once completely cooled, wrap them tightly in cling film and store at room temperature. You can then frost and assemble the cake on the day of your event, which helps keep it wonderfully fresh.
What if I don't have self-raising flour?
Not to worry, my dear! You can easily make your own. For every 100g of plain (all-purpose) flour, simply add 1 teaspoon of baking powder. So, for this recipe, you would use 225g of plain flour with 2¼ teaspoons of baking powder, and perhaps a tiny pinch of salt for flavour balance.
Can I add other flavourings to this cake?
Indeed you can! This vanilla base is wonderfully adaptable. You could add a little lemon zest for a zesty vanilla cake, or a tablespoon of cocoa powder (reducing the flour slightly) for a marble effect. For a hint of almond, a few drops of almond extract would be lovely. Experiment and have fun with it!