Mary Berry Recipes
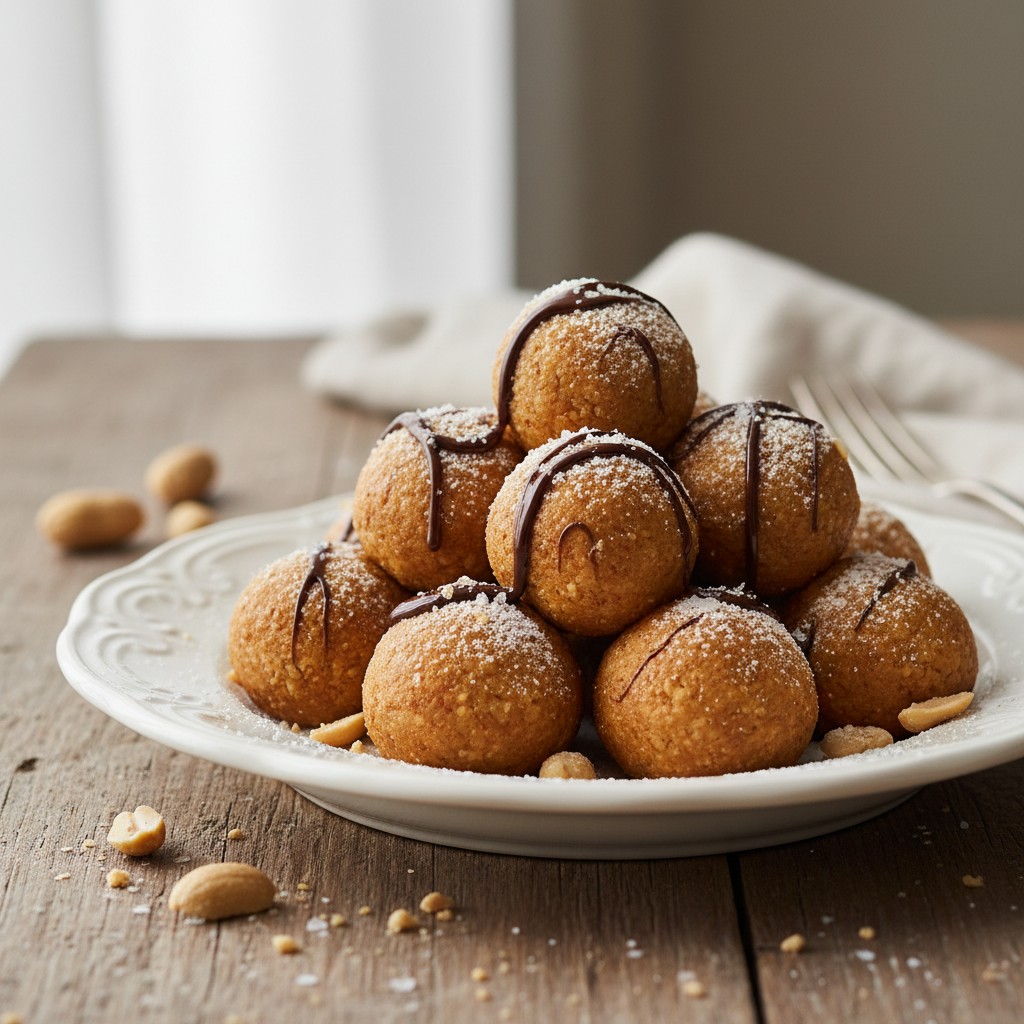
Irresistible No-Bake Peanut Butter Balls
These delightful no-bake peanut butter balls are a true joy to make and even more so to eat. A wonderfully simple recipe that brings smiles all around, perfect for an afternoon treat or a party spread.
Why You'll Love This Recipe
- No baking required, making it wonderfully simple for all skill levels and perfect for warmer days.
- A delightful blend of sweet and salty, appealing to every palate and satisfying those indulgent cravings.
- Perfect for making ahead, ideal for parties, gifts, or a quick treat to have on hand for unexpected guests.
Ingredients
- 200g (1 cup) creamy peanut butter (good quality, not natural style)
- 115g (1/2 cup) unsalted butter, softened
- 200g (1 ¾ cups) icing sugar (confectioners' sugar), sifted
- 1 tsp vanilla extract
- 200g (7 oz) milk or dark chocolate, for coating
Equipment Needed
Large mixing bowl • Electric mixer or wooden spoon • Sieve (for icing sugar) • Baking tray • Parchment paper • Heatproof bowl and saucepan (or microwave-safe bowl) • Fork or dipping tools
Step-by-Step Instructions
- Begin by taking a large mixing bowl. Add the creamy peanut butter and the softened unsalted butter. Ensure your butter is truly soft, as this will make combining everything so much easier.
- Using an electric mixer or a sturdy wooden spoon, beat the peanut butter and butter together until they are wonderfully smooth and well combined. This should only take a couple of minutes.
- Gradually add the sifted icing sugar to the mixture, a little at a time, beating after each addition. Continue until all the icing sugar is incorporated and you have a lovely, firm dough-like consistency. Stir in the vanilla extract.
- Now for the fun part! Take small portions of the mixture, about a tablespoon each, and roll them gently between your palms to form neat, uniform balls. Place these on a baking tray lined with parchment paper. Once all the mixture is rolled, pop the tray into the refrigerator for at least 30 minutes, or even an hour, to allow them to firm up properly. This step is crucial for easy dipping!
- While the peanut butter balls are chilling, prepare your chocolate coating. Break the chocolate into small pieces and melt it gently. You can do this either in a heatproof bowl set over a saucepan of simmering water (a bain-marie, as we call it) or in the microwave, stirring every 30 seconds, until smooth and glossy. Be careful not to overheat the chocolate.
- Once the peanut butter balls are firm, take them out of the fridge. Using a fork or a dipping tool, carefully dip each ball into the melted chocolate, ensuring it's completely coated. Gently tap off any excess chocolate.
- Return the chocolate-coated balls to the parchment-lined baking tray. If you like, you can sprinkle a little sea salt or some chopped nuts over the wet chocolate for an extra touch of elegance. Allow the chocolate to set completely at room temperature or, if you're in a hurry, in the refrigerator for about 15-20 minutes.
- Once the chocolate is firm, your irresistible no-bake peanut butter balls are ready to be enjoyed! Store them in an airtight container in the refrigerator to maintain their lovely texture.
How to Store \u0026 Reheat
These no-bake peanut butter balls keep beautifully! Store them in an airtight container in the refrigerator for up to 1-2 weeks. They are not suitable for reheating as they are designed to be enjoyed chilled or at room temperature. For the best flavour and texture, allow them to sit out for about 10-15 minutes before serving if they've been in the fridge.
Mary's Secrets to Success
For sheer perfection, always use a good quality creamy peanut butter; it makes all the difference to the texture and flavour. Don't be tempted to rush the chilling process – it's absolutely vital for firm, easy-to-handle balls that hold their shape beautifully. And when dipping in chocolate, work quickly and neatly for that professional finish. A little patience and a steady hand will ensure a beautifully uniform coating every time. These truly are a wonderfully simple confection that brings so much joy!
Frequently Asked Questions
Can I use natural peanut butter for this recipe?
While I adore natural peanut butter, for this particular recipe, a creamy, processed peanut butter (like a smooth, well-known brand) truly works best. Natural peanut butter tends to be oilier and can make the mixture too soft and difficult to roll into firm balls. If you must use it, you might need to increase the icing sugar slightly to achieve the correct consistency, but be mindful of the sweetness!
How can I make these peanut butter balls dairy-free?
Certainly! To make these dairy-free, simply substitute the unsalted butter with a good quality dairy-free block butter alternative. For the chocolate coating, ensure you choose a dairy-free chocolate; many dark chocolates are naturally dairy-free, but always check the label to be sure. The result will be just as delightful!
Can these peanut butter balls be frozen?
Oh yes, they freeze wonderfully! Once the chocolate coating has fully set, you can place them in a single layer in an airtight container, separated by parchment paper, and freeze them for up to 2-3 months. Simply take them out of the freezer about 30 minutes before you wish to serve them to allow them to thaw slightly. A perfect make-ahead treat!
My peanut butter mixture is too sticky/crumbly. What should I do?
If your mixture is too sticky, it likely needs a little more icing sugar. Add a tablespoon at a time and mix until it reaches a firm, rollable consistency. If it's too crumbly, it might be a bit dry. Try adding a tiny splash of milk (dairy or plant-based) or a touch more melted butter, just half a teaspoon at a time, until it comes together beautifully. Getting the texture just right is key for those perfectly formed balls.
What other toppings or coatings can I use instead of just chocolate?
You can absolutely get creative with your coatings! Instead of plain chocolate, you could use white chocolate, or even a mix of milk and white chocolate for a marbled effect. For toppings, consider finely chopped nuts like pecans or almonds, colourful sprinkles for a festive touch, shredded coconut, or even a drizzle of contrasting melted chocolate. Have fun experimenting!