Mary Berry Recipes
Classic Victoria Sponge Cake
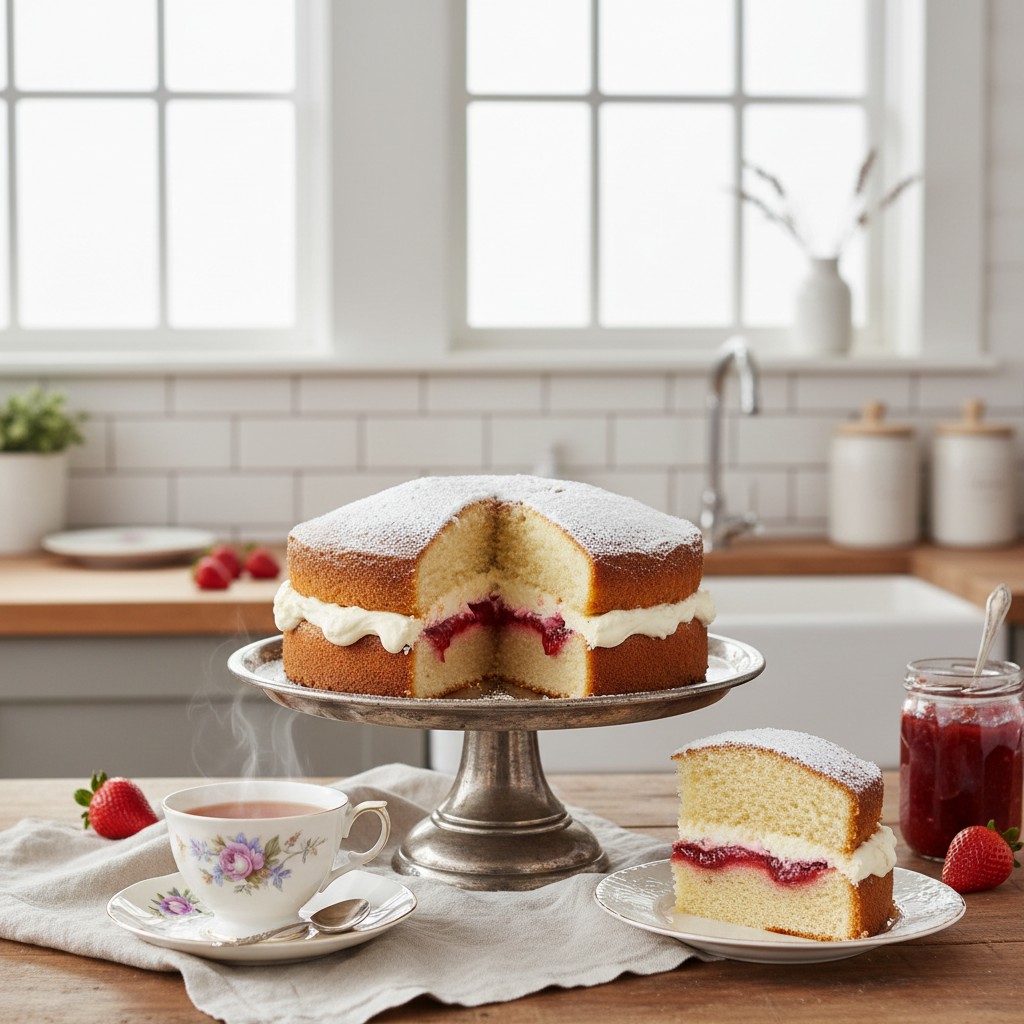
A truly iconic bake, the Victoria Sponge is a staple of British tea times, offering a delicate balance of light sponge, sweet jam, and rich cream. It's wonderfully simple to make and always brings a smile to everyone's face.
Why You'll Love This Recipe
- Uses the 'all-in-one' method for ease and consistently light, airy results.
- Achieves a beautifully tender crumb and delicate flavour, characteristic of a true Victoria Sponge.
- The simple, traditional filling of sweet jam and rich cream perfectly complements the subtle sponge.
Ingredients
- 225g (8oz) self-raising flour, sifted
- 225g (8oz) caster sugar
- 225g (8oz) unsalted butter, softened (at room temperature)
- 4 large free-range eggs, at room temperature
- 1 teaspoon vanilla extract
- For the filling:
- 100g (4oz) good quality strawberry or raspberry jam
- 250ml (9fl oz) double cream
- 1 tablespoon icing sugar, for dusting
Equipment Needed
Two 20cm (8-inch) round sandwich tins • Electric mixer (handheld or stand mixer) • Large mixing bowl • Rubber spatula • Baking parchment • Wire cooling rack • Serving plate • Sifter (for flour and icing sugar)

Step-by-Step Instructions
- First, my dears, preheat your oven to 180°C (160°C fan/Gas Mark 4). Then, lightly butter and line the bases of two 20cm (8-inch) round sandwich tins with baking parchment. This ensures your cakes will slide out beautifully.
- Now for the sponge itself! In a large mixing bowl, measure out the self-raising flour, caster sugar, softened butter, and the four lovely eggs. Add the vanilla extract too. This is my 'all-in-one' method, wonderfully simple and effective!
- Using an electric mixer, beat all the ingredients together until they are thoroughly combined and the mixture is light and fluffy. Scrape down the sides of the bowl to ensure everything is incorporated evenly. Beat for about 2-3 minutes until the batter is pale and smooth.
- Divide the mixture equally between your two prepared sandwich tins. Use the back of a spoon or a small palette knife to gently smooth the tops – this helps them bake evenly.
- Pop the tins into your preheated oven and bake for 20-25 minutes, or until the cakes are golden brown, well-risen, and spring back when lightly pressed in the centre. A skewer inserted into the middle should come out clean.
- Once baked, remove the cakes from the oven and let them sit in their tins for a few minutes. Then, carefully turn them out onto a wire rack, peel off the baking parchment, and leave them to cool completely. Patience is a virtue here, my dears, as a warm cake will melt your lovely cream!
- While the cakes are cooling, prepare your filling. Whip the double cream until it forms soft peaks. Be careful not to over-whip it, or it will become grainy.
- Once the cakes are completely cold, place one sponge onto your serving plate, flat side up. Spread it generously with your chosen jam – I do love a good strawberry or raspberry jam here. Then, gently spoon or pipe your whipped cream over the jam.
- Carefully place the second sponge on top, flat side down, to create that lovely sandwich effect. Finish with a delicate dusting of icing sugar over the top. And there you have it, a truly magnificent Victoria Sponge, ready to be enjoyed!
How to Store \u0026 Reheat
To keep your beautiful Victoria Sponge at its best, store it in an airtight container in the refrigerator. It will keep wonderfully for up to 2-3 days. While you can technically freeze the plain sponge cakes (unfilled), I always recommend filling and serving fresh for that ultimate delicate texture. Once filled with cream, freezing is not advised as the cream's texture will suffer upon thawing. Simply bring it to room temperature for about 30 minutes before serving to ensure the sponge is beautifully soft and the flavours are at their peak.
Mary's Secrets to Success
The absolute secret to a truly magnificent Victoria Sponge, my dears, lies in the quality of your ingredients and the gentle handling of your batter. Ensure your butter and eggs are at room temperature – this helps them emulsify beautifully, giving you a light and airy sponge. Do resist the urge to open the oven door too soon, and always, always allow your sponges to cool completely before filling. A perfectly cool cake prevents the cream from melting and ensures a clean, elegant slice. And remember, baking should be a joy, so take your time and enjoy the process!
Frequently Asked Questions
My sponge always turns out a bit heavy. What am I doing wrong?
Ah, a common query, my dear! The secret to a light sponge is ensuring your butter is truly softened to room temperature – not melted, but soft enough to easily indent with a finger. Also, don't be tempted to overmix once the flour is added. Beat until just combined and light, and then stop. Overmixing develops the gluten, which can lead to a tougher cake. And make sure your self-raising flour is fresh!
Can I make this recipe gluten-free?
Indeed you can! Simply substitute the self-raising flour with a good quality gluten-free self-raising flour blend. You might find adding an extra egg or a touch more liquid helps with the texture, as gluten-free flours can be a little drier. Always check the specific recommendations on your chosen gluten-free flour packet.
What's the best way to ensure my cakes rise evenly?
Even rising is key to a beautiful presentation! Make sure your oven is preheated properly and that your tins are lined and buttered evenly. When dividing the batter, try to be as precise as possible, weighing it if you like. And crucially, don't open the oven door during the first 15 minutes of baking, as this can cause the cakes to sink.
Can I use different fillings instead of jam and cream?
Absolutely! While jam and cream are traditional, feel free to experiment. A lovely lemon curd, a rich buttercream, or even fresh berries with a light crème fraîche could be delightful. Just remember to keep the proportions balanced so the filling doesn't overpower the delicate sponge.
My cake often sticks to the tin. Any tips?
Oh, how frustrating! The trick here is thorough preparation. Always butter your tins generously and then line the bases with baking parchment. I even like to dust the buttered sides with a little flour after lining. And remember, allow the cakes to cool in the tins for just a few minutes before turning them out onto a wire rack. This gives them a moment to firm up before handling.