Mary Berry Recipes
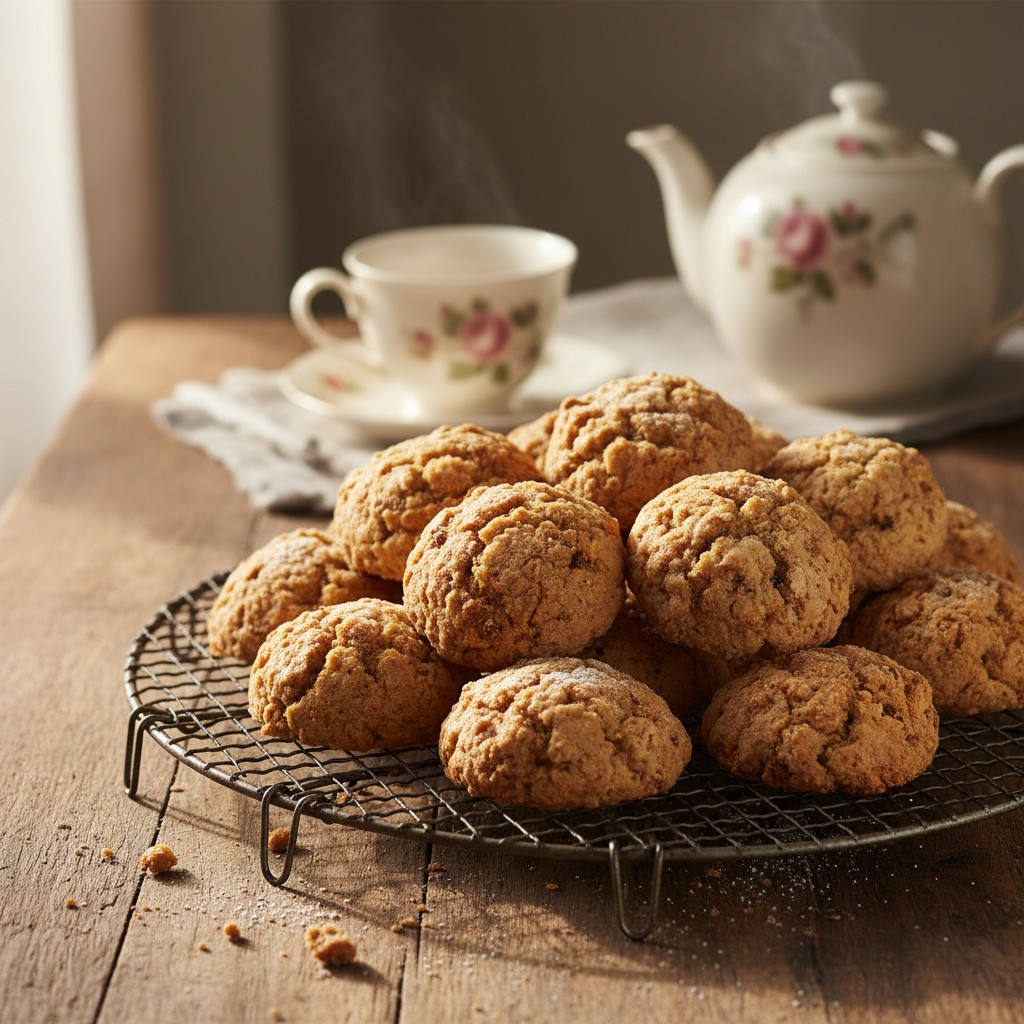
Classic British Rock Cakes
These delightful rock cakes are a true taste of British tradition, wonderfully simple to make and perfect for an afternoon treat. Their rustic charm and crumbly texture will bring a smile to everyone's face.
Why You'll Love This Recipe
- Wonderfully quick to prepare, ideal for spontaneous baking moments.
- Uses readily available pantry ingredients, making it an economical and accessible bake.
- Delivers a deliciously rustic, satisfying texture and classic British flavour that appeals to all ages.
Ingredients
- 225g (8oz) self-raising flour
- Pinch of salt
- 50g (2oz) cold butter, cubed
- 75g (3oz) caster sugar
- 100g (4oz) mixed dried fruit (such as currants, sultanas, or mixed peel)
- Zest of 1/2 lemon (optional, but highly recommended for brightness)
- 1 large egg, beaten
- 2-3 tablespoons milk, plus extra for glazing
Equipment Needed
Large mixing bowl • Sieve • Baking tray • Wire cooling rack • Grater (for lemon zest) • Measuring spoons and cups
Step-by-Step Instructions
- Preheat your oven to 200°C (180°C fan/Gas Mark 6). Lightly grease a large baking tray or line with baking parchment.
- In a large mixing bowl, sift together the self-raising flour and a pinch of salt. This helps to aerate the flour and prevent lumps.
- Add the cold, cubed butter to the flour. Using your fingertips, gently rub the butter into the flour until the mixture resembles fine breadcrumbs. It's important to keep your hands cool to prevent the butter from melting too quickly.
- Stir in the caster sugar, mixed dried fruit, and the lovely lemon zest (if using). Give it a good mix to ensure everything is evenly distributed.
- Make a well in the centre of the dry ingredients. Pour in the beaten egg and about 2 tablespoons of milk. Use a knife or your hand to mix everything together, bringing it into a stiff, shaggy dough. Add the remaining tablespoon of milk if the mixture seems too dry; you're looking for a consistency that just holds together, not a smooth dough.
- Now for the 'rock' part! Take spoonfuls of the mixture and place them onto your prepared baking tray. Don't worry about making them perfectly round or smooth; embrace their rustic, craggy appearance. They should look like little rocky mounds.
- Brush the tops of the rock cakes with a little extra milk – this will give them a lovely golden sheen as they bake.
- Bake in the preheated oven for 20-25 minutes, or until they are beautifully golden brown and firm to the touch. They should sound hollow when tapped on the bottom.
- Once baked, transfer the rock cakes to a wire rack to cool completely. Resist the urge to tuck in immediately, although I know it's terribly tempting when they smell so divine!
- Serve these delightful treats with a lovely cup of tea, and enjoy a true taste of British baking.
How to Store \u0026 Reheat
Rock cakes are best enjoyed on the day they are baked, when they are at their freshest and most crumbly. However, they will keep well for up to 3 days when stored in an airtight container at room temperature. They can also be frozen for up to 3 months; simply thaw at room temperature and refresh in a warm oven for a few minutes to bring back some of their lovely texture.
Mary's Secrets to Success
My secrets to success for these delightful rock cakes are quite simple, really. Firstly, always use cold butter and rub it in lightly and quickly to create that lovely, crumbly texture. Secondly, and this is crucial, do not overmix the dough once you've added the liquid; a light touch is key for tenderness. And finally, don't be afraid of their 'rocky' appearance – that's their charm! Embrace the rustic look, and you'll have sheer perfection every time.
Frequently Asked Questions
Why are they called 'rock cakes'?
They get their charming name from their wonderfully rustic, craggy, and uneven appearance, resembling small rocks. It's part of their character, so don't try to make them perfectly smooth!
My rock cakes turned out hard, what went wrong?
The most common culprit for hard rock cakes is overworking the dough. Just like scones, the less you handle the mixture once the liquid is added, the more tender and crumbly your rock cakes will be. Mix just until combined.
Can I add different ingredients to the rock cakes?
Absolutely, my dear! Feel free to get creative. A sprinkle of cinnamon or mixed spice works beautifully, or you could add chopped nuts, chocolate chips, or even different dried fruits like cranberries or chopped apricots for variety.
How do I ensure a good rise?
Using fresh self-raising flour is key, as the leavening agents can lose their potency over time. Also, ensure your oven is preheated to the correct temperature, as a hot oven helps the cakes rise quickly and achieve that lovely texture.
Can these be made gluten-free?
Yes, indeed! You can successfully make these gluten-free by using a good quality gluten-free self-raising flour blend. Just be mindful that gluten-free flours can absorb liquid differently, so you might need a tiny bit more or less milk to achieve the right dough consistency.