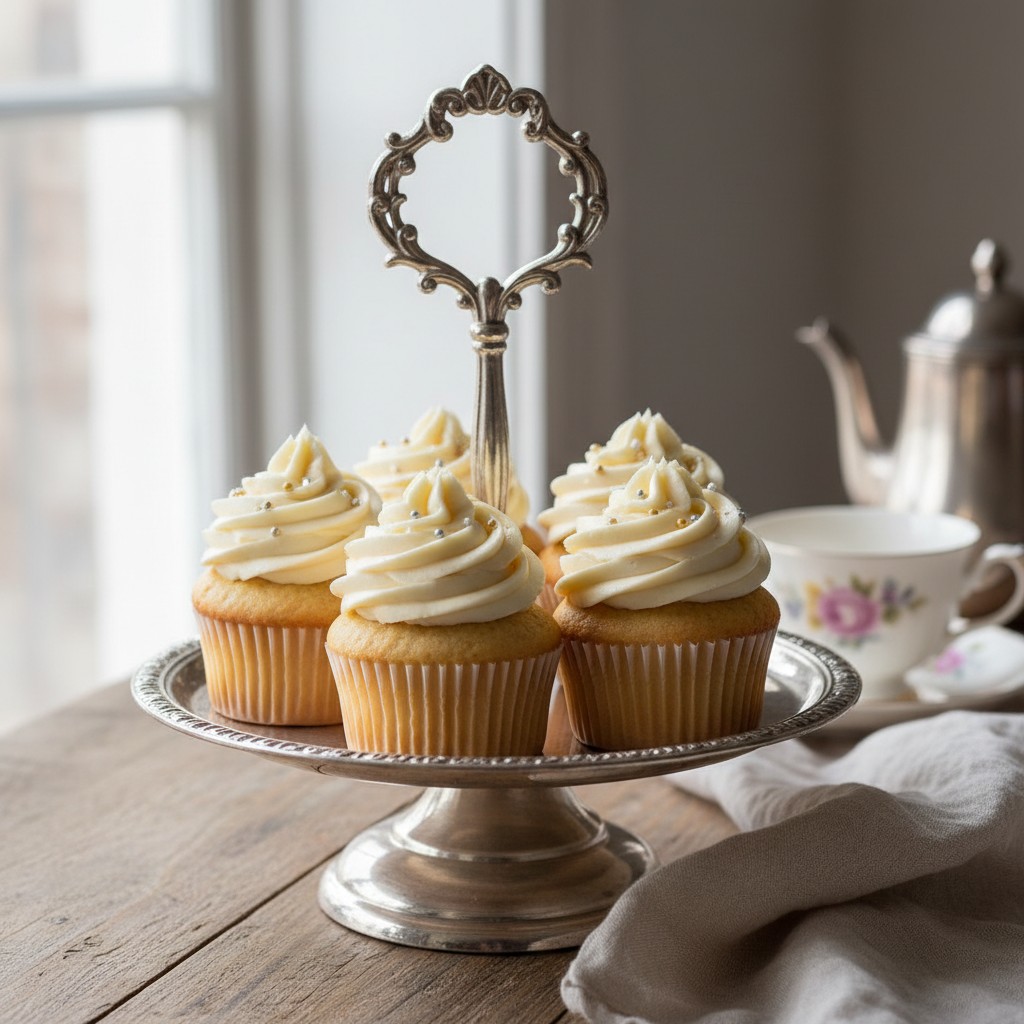
Mary Berry Recipes
Classic Vanilla Cupcakes
These classic vanilla cupcakes are a true delight, wonderfully simple to make and perfect for any occasion. With Mary's trusted method, you'll achieve beautifully light and fluffy results every single time.
Why You'll Love This Recipe
- This recipe provides a reliable, foolproof method for consistently light and fluffy sponges.
- The classic vanilla flavour is universally loved and appeals to all ages, making it perfect for any gathering.
- It's a wonderfully versatile base, allowing for endless customisation with different frostings, colours, and decorations.
Ingredients
- For the Cupcakes:
- 175g self-raising flour
- 175g caster sugar
- 175g softened butter (at room temperature)
- 3 large eggs
- 1 tsp vanilla extract
- 2 tbsp milk
- For the Vanilla Buttercream:
- 150g softened butter (at room temperature)
- 300g icing sugar, sifted
- 1 tsp vanilla extract
- 1-2 tbsp milk
Equipment Needed
12-hole muffin tin • Paper cupcake cases • Large mixing bowls (2) • Electric hand mixer or stand mixer • Measuring spoons and cups • Wire cooling rack • Sieve (for icing sugar) • Spatula or palette knife (for frosting) • Piping bag and nozzle (optional, for decorative frosting)
Step-by-Step Instructions
- Preheat your oven to 180°C (160°C fan/Gas 4). Line a 12-hole muffin tin with paper cupcake cases. This ensures they bake beautifully and are easy to remove.
- For the cupcakes, place the self-raising flour, caster sugar, softened butter, eggs, vanilla extract, and milk into a large mixing bowl. Using an electric mixer, beat all the ingredients together until they are thoroughly combined and the mixture is light and fluffy. Be careful not to overmix, as this can make your cupcakes tough.
- Divide the mixture evenly among the 12 cupcake cases. A good trick is to use an ice cream scoop to ensure even portions.
- Bake in the preheated oven for 15-18 minutes, or until golden brown and a skewer inserted into the centre of a cupcake comes out clean. Resist the urge to open the oven door too early!
- Remove the cupcakes from the oven and let them cool in the tin for a few minutes before transferring them to a wire rack to cool completely. They must be entirely cool before frosting.
- While the cupcakes are cooling, prepare the buttercream. Place the softened butter into a clean mixing bowl and beat with an electric mixer until very pale and fluffy. This can take a good few minutes, but it's worth the effort for a light buttercream.
- Gradually add the sifted icing sugar, a spoonful at a time, beating well after each addition. Once all the icing sugar is incorporated, add the vanilla extract and 1 tablespoon of milk. Beat again until smooth and creamy. If the buttercream is too stiff, add the second tablespoon of milk, a little at a time, until you reach a pipeable consistency.
- Once the cupcakes are completely cold, pipe or spread the buttercream generously over the tops. You can add sprinkles or other decorations if you wish, for a truly festive touch. Serve and enjoy your sheer perfection!
How to Store \u0026 Reheat
To keep these cupcakes at their very best, store them in an airtight container at room temperature. They will stay wonderfully fresh for 2-3 days once frosted. If you've baked them ahead and not yet frosted them, the unfrosted sponges can be kept in an airtight container for up to 4 days, or frozen for up to 3 months. Thaw completely at room temperature before frosting and serving. I don't recommend reheating cupcakes, as it can dry them out.
Mary's Secrets to Success
My dear bakers, here are my top tips for truly perfect vanilla cupcakes: 1. **Room Temperature Ingredients:** Always ensure your butter and eggs are at room temperature. This helps them emulsify beautifully, creating a smoother batter and a lighter, more tender crumb. 2. **Don't Overmix:** Once you've added the flour, mix just until the ingredients are combined. Overmixing develops the gluten too much, leading to tough cupcakes. 3. **Accurate Oven Temperature:** An accurate oven is key! If your oven runs hot or cold, it can affect the rise and texture. Use an oven thermometer if you're unsure. 4. **Bake Until Just Done:** Test with a skewer – it should come out clean. Overbaking is the quickest way to dry cupcakes, so keep a watchful eye! 5. **Cool Completely:** Patience is a virtue! Ensure your cupcakes are entirely cold before applying any buttercream, otherwise, it will simply melt away.
Frequently Asked Questions
Why are my cupcakes dry?
Often, dry cupcakes are the result of over-baking or over-mixing the batter. Ensure you bake them only until a skewer comes out clean, and mix the batter just until combined, no more. Room temperature ingredients also help achieve a tender crumb.
How do I get a perfectly domed top on my cupcakes?
For that lovely domed top, ensure your oven temperature is accurate and try to fill your cases about two-thirds full. Don't be tempted to open the oven door too early, especially in the first 10 minutes, as this can cause them to sink.
Can I make these chocolate cupcakes instead?
Yes, indeed! To transform these into chocolate cupcakes, simply replace about 2 tablespoons of the self-raising flour with good quality cocoa powder. You might need to add a tiny splash more milk if the batter seems too thick, just to get that perfect consistency.
How long do these cupcakes keep fresh?
These cupcakes, once frosted, are best enjoyed within 2-3 days when stored in an airtight container at room temperature. Unfrosted, the sponges can last a day longer.
Can I freeze these cupcakes?
Yes, absolutely! Unfrosted cupcakes freeze beautifully. Allow them to cool completely, then wrap each one individually in cling film and place them in an airtight freezer-safe container. They'll keep for up to 3 months. Thaw at room temperature before frosting and serving.