Mary Berry Recipes
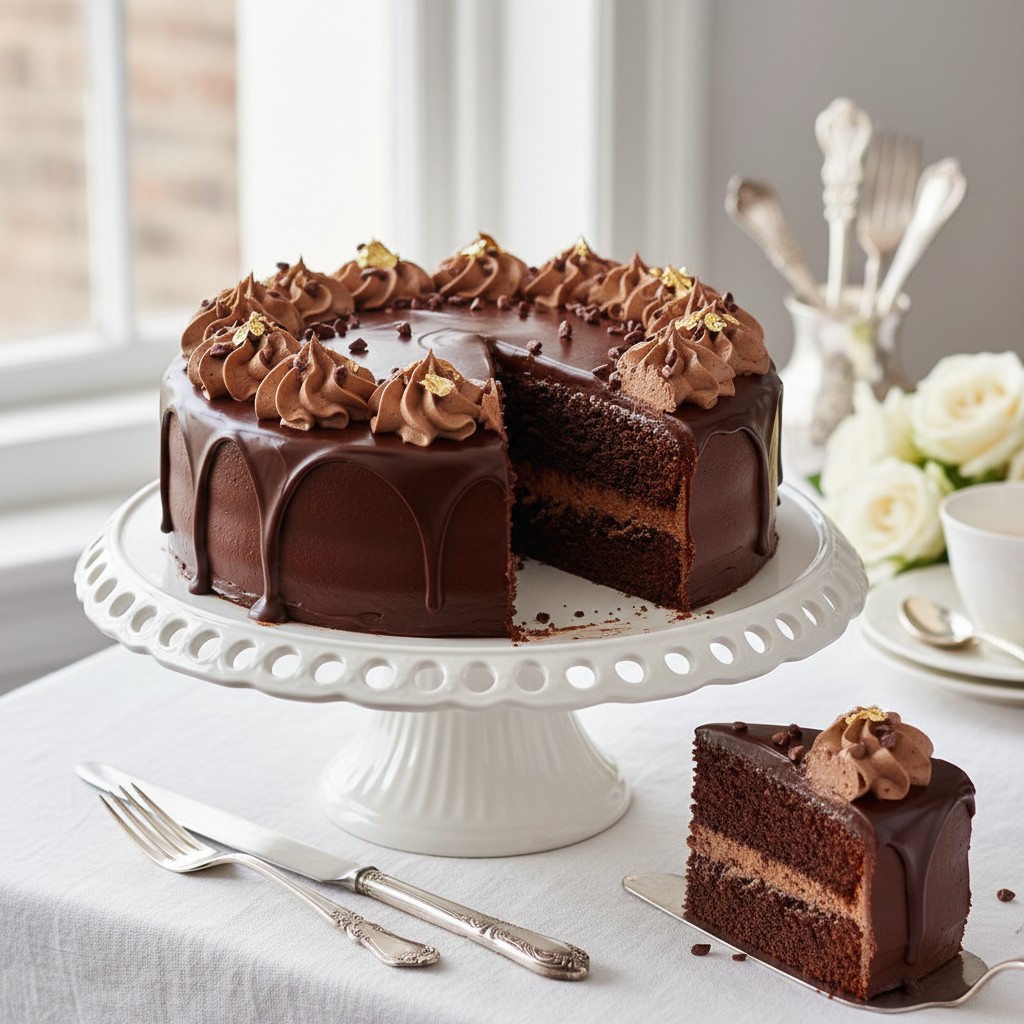
Simply Perfect Rich Chocolate Cake
This truly is a wonderfully simple yet utterly delicious chocolate cake, guaranteed to bring smiles to faces. It's a classic for a reason, my dear, and you'll find it a sheer delight to bake.
Why You'll Love This Recipe
- Uses the 'all-in-one' method, making it wonderfully simple and quick to prepare.
- Delivers a consistently moist and tender crumb with a rich, balanced chocolate flavour.
- Versatile enough for everyday treats or dressed up for special celebrations.
Ingredients
- 225g (8oz) self-raising flour
- 3 tbsp good quality cocoa powder
- 1 tsp baking powder
- 225g (8oz) soft butter, plus extra for greasing
- 225g (8oz) caster sugar
- 4 large eggs
- 2 tbsp milk
- 1 tsp vanilla extract
- 150g (5oz) soft butter (for buttercream)
- 300g (10oz) icing sugar, sifted (for buttercream)
- 3 tbsp cocoa powder, sifted (for buttercream)
- 3-4 tbsp milk (for buttercream)
- 1 tsp vanilla extract (for buttercream)
- Chocolate curls or sprinkles (optional, for decoration)
Equipment Needed
Two 20cm (8-inch) round sandwich tins • Baking parchment • Large mixing bowl • Electric hand whisk (or a good sturdy wooden spoon) • Spatula • Wire cooling rack • Sieve (for icing sugar and cocoa)
Step-by-Step Instructions
- Preheat your oven to 180°C (160°C fan/350°F/Gas Mark 4). Grease and line two 20cm (8-inch) round sandwich tins with baking parchment. This ensures your cakes turn out beautifully, my dear.
- In a large mixing bowl, combine all the cake ingredients: the self-raising flour, cocoa powder, baking powder, soft butter, caster sugar, eggs, milk, and vanilla extract.
- Beat the mixture with an electric hand whisk for about 2-3 minutes, until it's light, fluffy, and well combined. Don't overmix, just until everything is incorporated. This 'all-in-one' method is wonderfully simple, don't you find?
- Divide the mixture evenly between the two prepared sandwich tins. Gently level the tops with a spatula.
- Bake in the preheated oven for 25-30 minutes, or until the cakes are golden brown, well risen, and spring back when lightly pressed in the centre. A skewer inserted into the middle should come out clean.
- Once baked, leave the cakes to cool in their tins for 5-10 minutes before turning them out onto a wire rack to cool completely. Patience is a virtue here, my dears!
- While the cakes are cooling, prepare the buttercream. In a clean bowl, beat the soft butter until creamy. Gradually add the sifted icing sugar and cocoa powder, beating well after each addition.
- Add the milk and vanilla extract, and continue to beat until the buttercream is light, fluffy, and spreadable. If it's too stiff, add a tiny bit more milk; if too soft, a little more icing sugar.
- Once the cakes are completely cold, spread about half of the buttercream on top of one cake. Carefully place the second cake on top.
- Use the remaining buttercream to generously spread over the top and sides of the assembled cake. Decorate with chocolate curls or sprinkles, if desired, for that extra touch of elegance.
- Slice and serve your simply perfect rich chocolate cake. It’s a triumph, don’t you agree?
How to Store \u0026 Reheat
This chocolate cake is best enjoyed within 2-3 days of baking. Store it in an airtight container at room temperature to keep it wonderfully moist. There's no need to refrigerate it, as this can dry out the sponge. Freezing is possible; wrap individual slices or the whole cake (unfrosted is best for freezing) tightly in cling film and then foil. It will keep for up to 3 months. Thaw at room temperature before serving.
Mary's Secrets to Success
My dear, for a truly successful chocolate cake, always ensure your butter and eggs are at room temperature. This helps them combine beautifully, creating a light and airy batter. Don't be tempted to open the oven door too early, as this can make your cakes sink. And remember, the joy of baking is in the process as much as the delicious outcome. Enjoy every moment!
Frequently Asked Questions
How do I ensure my chocolate cake is moist and not dry?
Ah, a common concern! The key to a moist cake lies in not overmixing the batter and not overbaking it. Once a skewer comes out clean, take it out of the oven immediately. Also, using soft butter and room temperature eggs helps create a smooth, emulsified batter that holds moisture beautifully.
Can I make this into cupcakes?
Absolutely, my dear! This recipe works wonderfully as cupcakes. Simply divide the batter among 12-18 cupcake cases in a muffin tin and bake for a shorter time, usually around 18-22 minutes, until a skewer comes out clean. Adjust the frosting quantity as needed.
My buttercream split or looks curdled, what went wrong?
This often happens if your butter is too cold, or if you've added the liquid too quickly. Ensure your butter is truly soft, almost at room temperature. If it does curdle, try warming a small portion of the buttercream gently over a bain-marie or in the microwave for a few seconds, then beat it back into the rest of the mixture. A little patience and persistent beating usually brings it back together!
Can I add chocolate chips to the cake batter?
Indeed you can! Adding a handful of good quality chocolate chips (about 100g or 3.5oz) to the batter before dividing it into tins will add another lovely layer of chocolatey texture and flavour. Just gently fold them in at the end.
What's the best type of cocoa powder to use?
For a truly rich and deep chocolate flavour, I always recommend using a good quality, unsweetened cocoa powder. Dutch-processed cocoa powder tends to be darker and less acidic, giving a smoother chocolate taste, which I find works beautifully in this recipe.